
Les chaises de bureau peuvent-elles exploser ? La vérité sur la sécurité des vérins à gaz

Les chaises de bureau peuvent-elles exploser ? La vérité sur la sécurité des vérins à gaz

Vous vous asseyez, vous vous penchez en arrière, et une pensée étrange vous vient à l'esprit : les chaises de bureau peuvent-elles exploser ? Cela ressemble à un mythe d'Internet, mais quelques incidents réels ont fait la une des journaux. La réponse honnête est qu'une véritable explosion de chaise de bureau est extrêmement rare, et cela n'arrive presque jamais avec une chaise correctement certifiée. Le risque réside dans une seule partie, le vérin à gaz, et la sécurité du vérin à gaz dépend de la qualité de fabrication, de la certification et de la façon dont vous traitez votre chaise. Ce guide sépare les faits de la peur, vous montre les signes avant-coureurs et explique comment nos chaises sont conçues pour éliminer les risques. 

Alors, les chaises de bureau peuvent-elles vraiment exploser ?

Voici la réponse directe. Oui, une explosion de chaise de bureau est possible, mais seulement dans de rares cas impliquant un vérin à gaz défectueux ou contrefait, et les chances que cela se produise avec une chaise certifiée sont infimes. Parmi des millions de chaises utilisées quotidiennement, seule une poignée d'incidents vérifiés ont été signalés dans le monde au cours des vingt dernières années. Chaque cas documenté remonte à la même cause fondamentale : un vérin pneumatique bon marché, non certifié, qui n'a jamais été construit selon une norme de sécurité reconnue.

Comment fonctionne réellement un vérin à gaz de chaise de bureau

Pour évaluer le risque, vous devez comprendre la pièce. Le vérin à gaz, également appelé ressort à gaz, est le tube métallique scellé qui soulève et abaisse votre siège. Il fonctionne selon quelques principes simples :

• Il est pneumatique, pas hydraulique.

• Il est rempli d'azote gazeux comprimé, un gaz inerte qui ne brûle pas.

• Lorsque vous tirez le levier, une valve libère de l'azote pour soulever ou abaisser le siège.

• Le gaz est scellé à l'intérieur d'un acier épais dont la résistance est bien supérieure à la pression de travail normale.

Un cylindre de qualité qui vieillit n'éclate pas. Il perd lentement de la pression, c'est pourquoi une vieille chaise commence à s'enfoncer plutôt que de se briser avec un bruit.

Mythe contre Réalité : Explosions de chaises de bureau

La plupart des peurs en ligne proviennent de demi-vérités. Voici ce qui est vrai et ce qui ne l'est pas.

Mythe

Fait

N'importe quelle chaise de bureau peut exploser au hasard.

Les chaises certifiées avec des vérins remplis d'azote n'explosent pas spontanément en utilisation normale.

Les chaises de gaming sont plus dangereuses que les chaises de bureau.

Elles utilisent le même mécanisme de vérin à gaz. La qualité de fabrication, et non la catégorie de la chaise, détermine la sécurité.

Le gaz à l'intérieur est inflammable.

Les vérins de qualité utilisent de l'azote gazeux inerte, qui ne peut pas s'enflammer.

Une chaise qui s'enfonce est sur le point d'exploser.

Un affaissement signale une fuite de pression lente, pas une explosion. C'est un signal de réparation, pas une alarme de danger.

La chaleur fera exploser votre chaise.

Une chaleur extrême peut stresser un vérin faible et de mauvaise qualité au fil du temps. Un vérin certifié est conçu pour des températures intérieures normales.

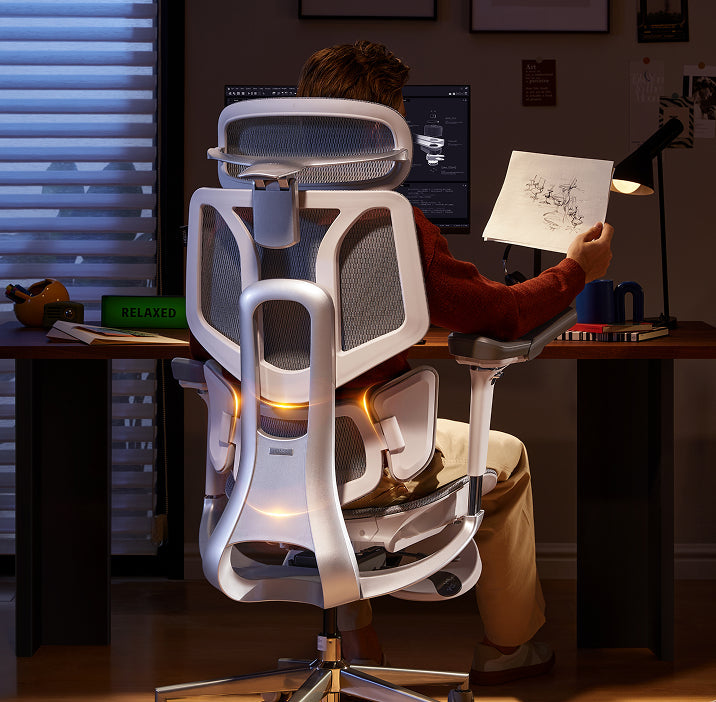
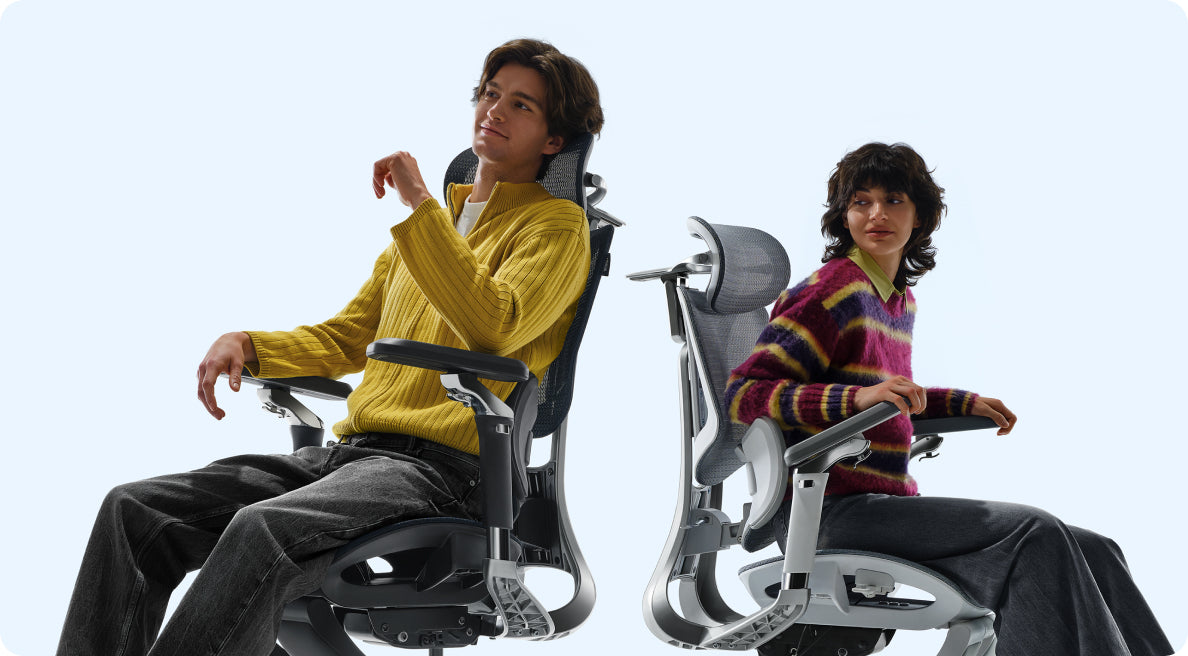
HBADA E3 ergonomic office chair user sitting posture

Quelles sont les causes réelles de la défaillance d'un vérin à gaz ?

Lorsqu'un vérin à gaz de chaise de bureau échoue de manière catastrophique, la cause est presque toujours évitable. Une courte liste de facteurs explique presque tous les cas signalés :

• Fabrication de qualité inférieure : acier fin et de mauvaise qualité qui ne peut pas supporter une pression normale.

• Mauvais gaz : certains fabricants à bas prix remplissent les vérins d'air comprimé au lieu d'azote gazeux. L'air contient de l'oxygène et de l'humidité, ce qui corrode le joint et augmente le risque d'éclatement.

• Surcharge : le dépassement de la capacité de poids nominale sollicite les composants internes.

• Chaleur prolongée : laisser une chaise en plein soleil ou près d'un radiateur dilate le gaz et fatigue les matériaux faibles.

• Manipulation par soi-même : ouvrir ou essayer de dégonfler un vérin est dangereux et une cause principale d'accidents.

• Âge et usure : les joints se dégradent au fil des ans, de sorte qu'un vérin non entretenu est plus susceptible de fuir.

Incidents documentés

Les cas qui alimentent les gros titres sont réels, mais isolés. Les incidents signalés, y compris un cas en 2009 dans le Shandong, en Chine, et une blessure distincte signalée en 2013, impliquaient tous deux des chaises à faible coût qui n'avaient jamais été certifiées selon une norme reconnue. Dans presque tous les récits, les enquêteurs ont pointé du doigt des vérins inférieurs remplis d'air comprimé plutôt que d'azote scellé. La leçon est constante : le danger réside dans le matériel non certifié, pas dans la technologie elle-même.

Signes avant-coureurs de défaillance de votre vérin à gaz

Votre chaise vous avertira généralement bien avant que quelque chose ne tourne mal. Agissez rapidement face à ces signes :

• Un sifflement ou une fuite provenant du vérin.

• Un siège qui s'enfonce seul et ne tient pas la hauteur, le classique siège qui s'enfonce.

• Fissures visibles, rouille ou bosses sur le tube métallique.

• Vacillements, claquements ou grincements lorsque vous ajustez la hauteur.

Si vous remarquez l'un de ces signes, cessez d'utiliser la chaise et remplacez le vérin à gaz ou la chaise. N'essayez jamais d'ouvrir ou de recharger le vérin vous-même.

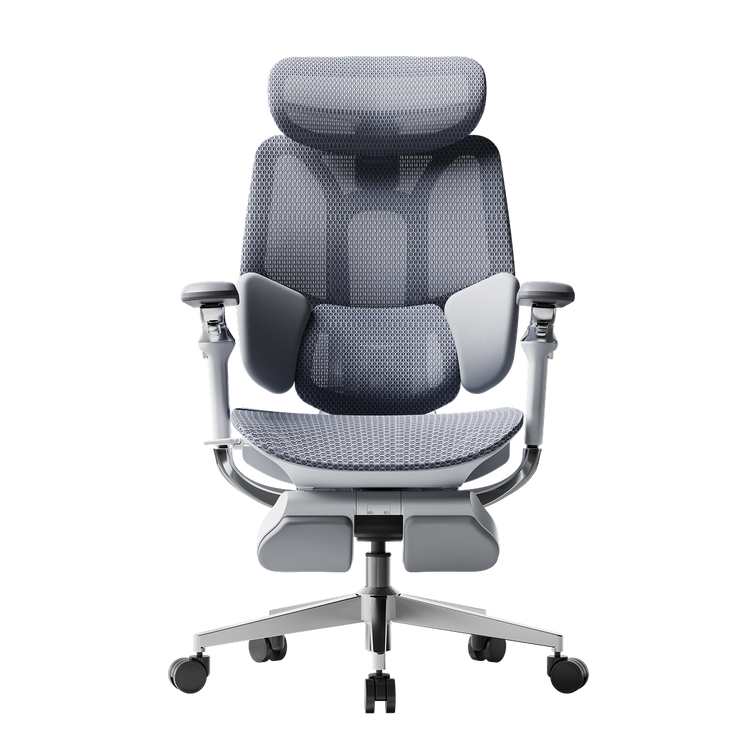
HBADA E3 breathable mesh ergonomic office chair close-up

Comment nous éliminons les risques de chaque chaise

La sécurité doit être intégrée dès la conception, et non espérée. Voici comment nos chaises éliminent les variables qui causent les pannes :

• Chaque chaise HBADA est livrée avec un vérin à gaz certifié BIFMA, testé selon le grade Classe 4 le plus élevé pour la résistance à la pression et la durabilité.

• Nos vérins utilisent de l'azote gazeux scellé de haute pureté à l'intérieur d'un acier épaissi et anti-explosion, jamais d'air comprimé.

• Les composants sont validés par des laboratoires indépendants, y compris SGS et TUV Rheinland, et chaque chaise passe plus de 100 000 tests de cycle.

• Chaque modèle est couvert par une garantie de 5 ans, de sorte qu'un vérin affaibli est remplacé, et non supporté.

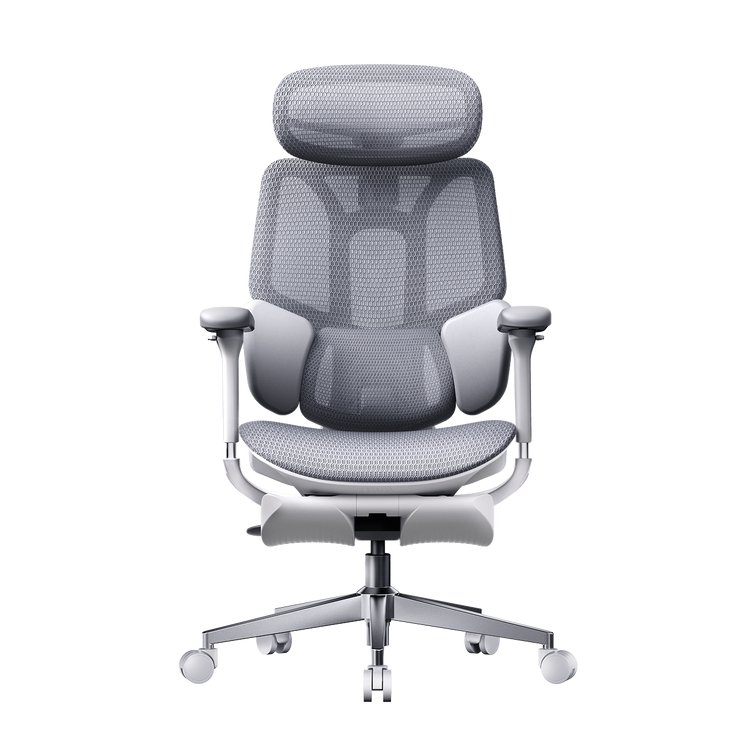
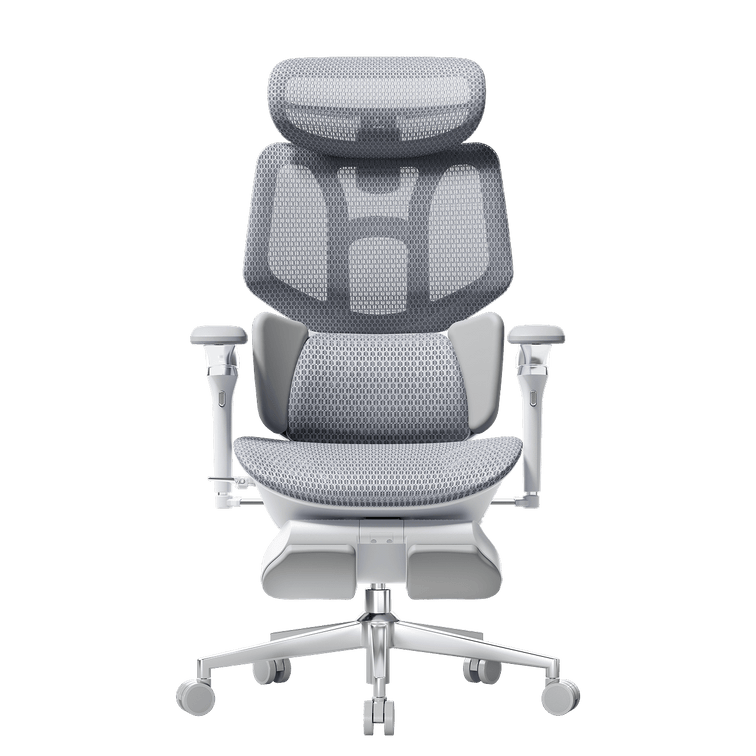
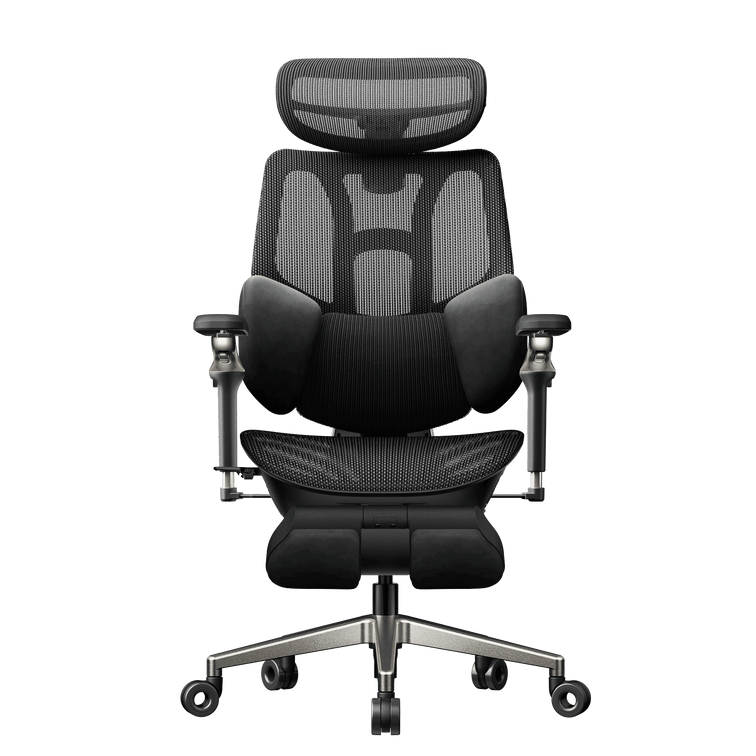
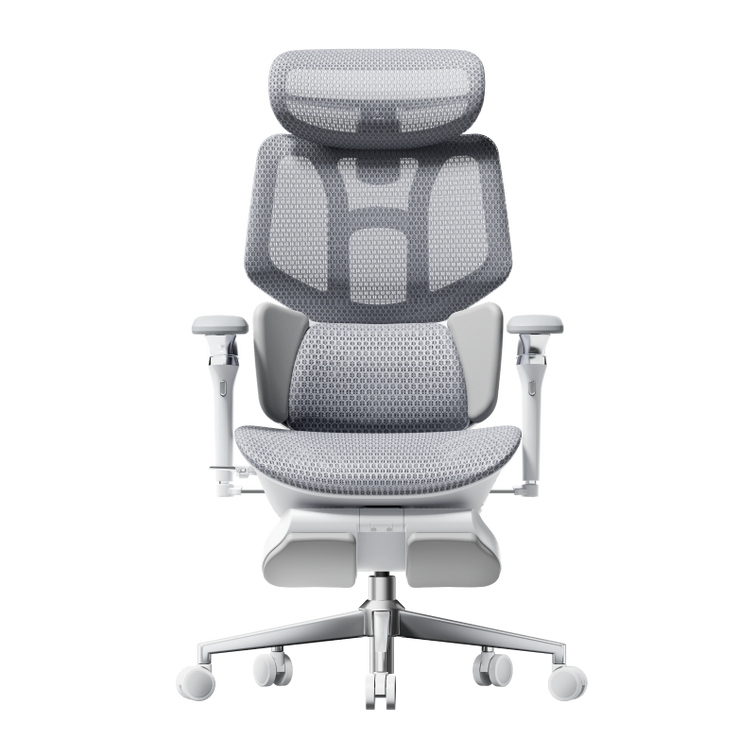
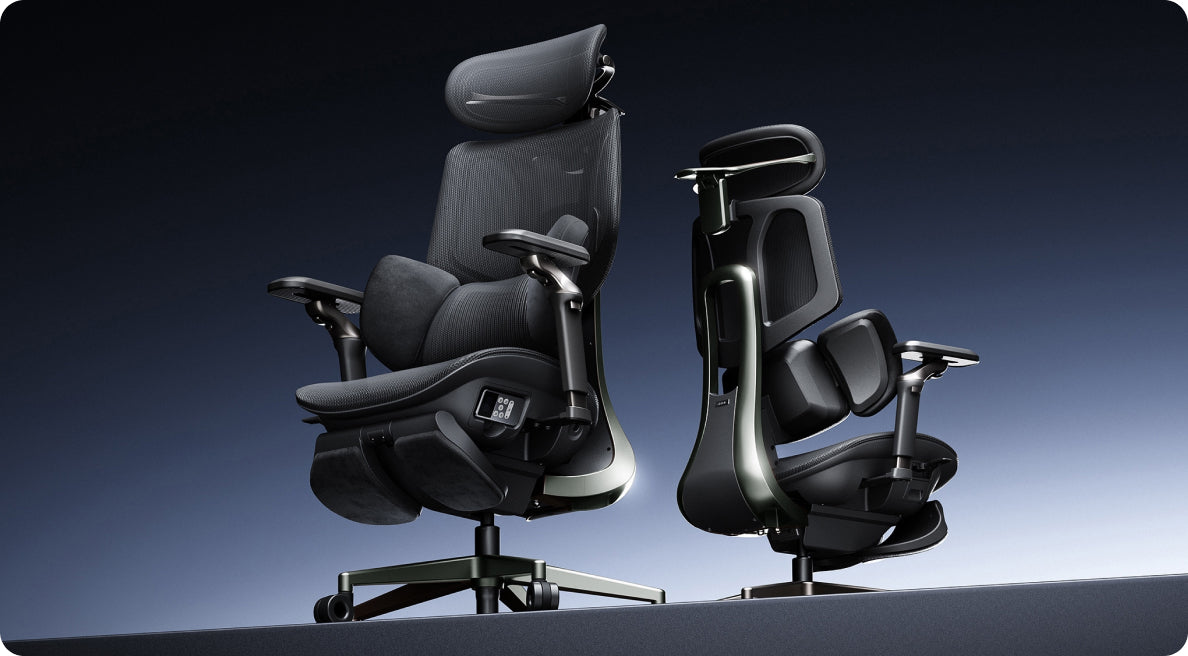
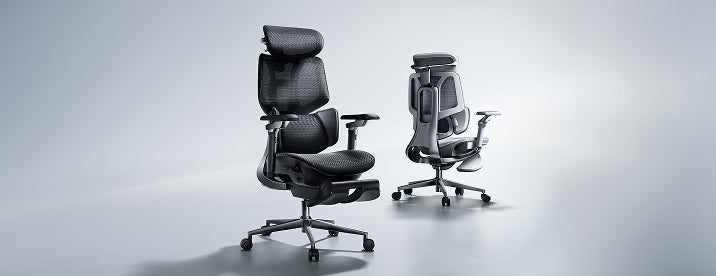
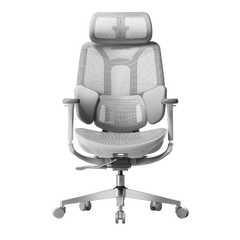
Pour les utilisateurs plus lourds et les longues périodes de travail, l'ingénierie du vérin à gaz certifié BIFMA de la HBADA E3 Pro 2026 Edition associe un vérin à gaz de classe 4 anti-affaissement à un châssis renforcé en acier et à notre soutien lombaire élastique à 3 zones.

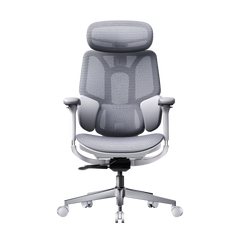
Si vous souhaitez un soutien actif et basé sur des capteurs, la conception de suivi lombaire AI de la chaise ergonomique intelligente HBADA X7 suit votre colonne vertébrale en temps réel tout en reposant sur la même plate-forme de vérin certifiée et anti-explosion.

Caractéristique

HBADA E3 Pro Édition 2026

Chaise ergonomique intelligente HBADA X7

Idéal pour

Usage intensif et longues périodes de travail

Soutien AI actif et précision tout au long de la journée

Vérin à gaz

Anti-affaissement Classe 4, certifié BIFMA

Classe 4, certifié BIFMA

Soutien lombaire

Soutien lombaire élastique à 3 zones

Suivi lombaire IA, ajustement automatique

Cadre

Châssis renforcé en acier

Cadre ergonomique renforcé

Inclinaison

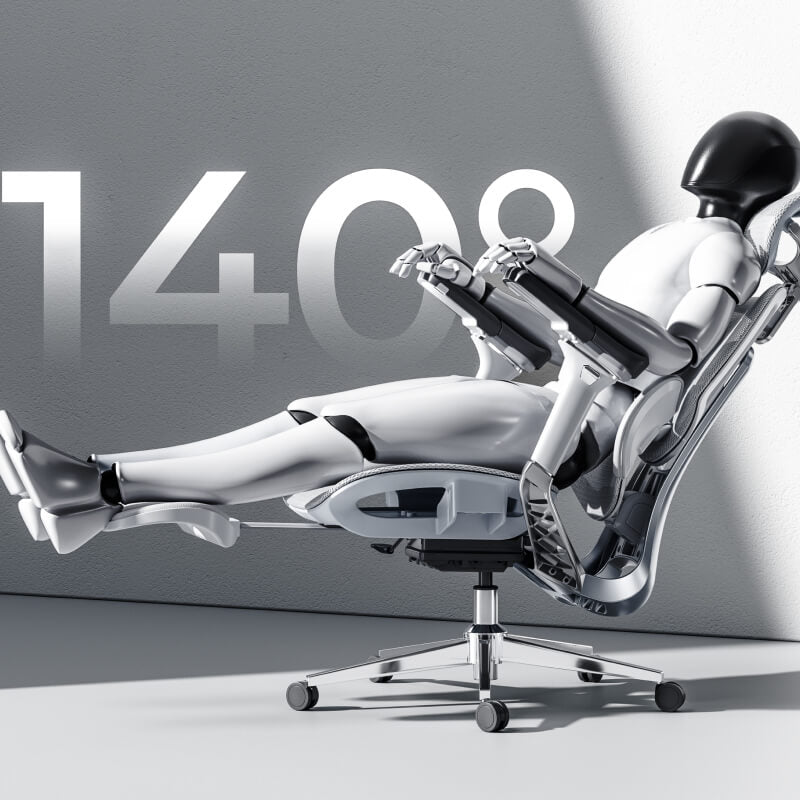
Jusqu'à 140 degrés

Dynamique, suivant la posture

Tests de sécurité

SGS, TUV, plus de 100 000 tests de cycle

SGS, TUV, plus de 100 000 tests de cycle

Garantie

5 ans

5 ans

Utilisateurs réels, résultats réels

Les spécifications comptent le plus lorsque vous pouvez les voir résoudre un problème réel. Voici deux utilisateurs très différents et comment la bonne chaise a résolu leur douleur.

Le télétravailleur intensif

Callum H., 34 ans, est ingénieur DevOps senior et streamer à temps partiel à Manchester (188 cm, 134 kg). Il avait utilisé trois chaises de bureau économiques en deux ans. La mousse se compressait, les vérins bon marché continuaient de tomber en panne sous ses quarts de travail de plus de 10 heures, et une chaise qui s'enfonçait constamment lui laissait un engourdissement dans le bas du dos. Il est passé à l'HBADA E3 Pro 2026 Edition. Le vérin à gaz de classe 4 anti-affaissement et le châssis renforcé en acier lui ont offert une base solide, tandis que le support lombaire élastique à 3 zones s'adaptait lorsqu'il se penchait pour taper ou s'inclinait à 140 degrés pour se reposer, répartissant son poids sans s'affaisser.

La professionnelle de petite taille

Hannah W., 28 ans, est graphiste à distance et blogueuse lifestyle à Bristol (155 cm, 50 kg). Les chaises standard étaient conçues pour un homme de taille moyenne, de sorte que le coussin lombaire était trop haut, ses pieds ne pouvaient pas reposer à plat et les accoudoirs larges laissaient ses coudes en l'air. Elle a opté pour la chaise ergonomique intelligente HBADA X7. Grâce au réglage de la profondeur du siège de 60 mm, elle a éliminé la pression sous la cuisse, et les accoudoirs bioniques rotatifs à 720 degrés se sont tournés vers l'intérieur pour soutenir ses bras pendant qu'elle dessinait sur son iPad, soulageant la tension à l'épaule qu'elle avait depuis des années.

Comment prévenir une explosion de chaise de bureau

La prévention est simple et dépend presque entièrement de vous. Suivez cette liste de contrôle :

1. Achetez certifié. Choisissez des chaises avec des vérins à gaz de classe 4 testés BIFMA ou SGS.

2. Respectez la limite. Restez dans la capacité de poids indiquée sur votre chaise.

3. Gardez-la au frais. Évitez la lumière directe du soleil et les radiateurs.

4. Inspectez-la trimestriellement. Vérifiez l'absence de fissures, de rouille ou de sifflements.

5. Ne jamais la manipuler. Ne démontez pas et ne rechargez pas le vérin à gaz vous-même.

6. Remplacez-la rapidement. Remplacez un vérin défaillant sans tarder plutôt que de le subir.

Les normes de sécurité qui comptent vraiment

Si vous ne vérifiez qu'une seule chose avant d'acheter, vérifiez la certification. Au Royaume-Uni, la référence est la norme BS EN 1335, la norme européenne pour les sièges de bureau, avec la norme BS EN 1335-2:2018 qui définit les exigences de sécurité, de résistance et de durabilité. Pour une durabilité mondiale, recherchez ANSI/BIFMA X5.1, la norme de performance nord-américaine pour les sièges de bureau à usage général. Des laboratoires indépendants tels que SGS et TUV vérifient ces affirmations, de sorte qu'un siège crédible est accompagné d'un rapport de test, et pas seulement d'un badge marketing.

Quel siège HBADA devriez-vous choisir ?

Alors, les chaises de bureau peuvent-elles exploser ? Oui, dans de rares cas, mais la bonne chaise en fait un non-problème. Adaptez la chaise à votre corps et à vos heures :

• Choisissez la HBADA E3 Pro 2026 Edition si vous êtes un utilisateur plus lourd, si vous restez assis pendant de longues périodes ou si vous souhaitez une stabilité maximale grâce à une construction renforcée en acier et anti-affaissement.

• Choisissez la chaise ergonomique intelligente HBADA X7 si vous souhaitez un suivi lombaire par IA et un réglage fin et spécifique au corps.

Dans tous les cas, vous obtenez un vérin à gaz certifié BIFMA, antidéflagrant, des tests en laboratoire indépendants et une garantie de 5 ans. C'est à cela que ressemble la vraie sécurité des vérins à gaz. Choisissez l'ajustement qui vous convient et ne vous souciez plus du vérin.

Questions Fréquemment Posées

Réponses rapides aux questions les plus fréquentes.

Les chaises de bureau peuvent-elles exploser ?

Oui, mais c'est extrêmement rare. L'explosion d'un véritable siège de bureau implique presque toujours un vérin à gaz bon marché et non certifié, rempli d'air comprimé au lieu d'azote scellé. Parmi des millions de sièges utilisés, seule une poignée d'incidents vérifiés ont été signalés en vingt ans. Un siège certifié avec un vérin de classe 4 testé BIFMA ne présente pas de risque significatif. Achetez certifié, respectez la limite de poids, et vous pourrez vous asseoir en toute confiance.

Pourquoi les vérins à gaz des sièges de bureau explosent-ils ?

La défaillance est généralement due à la qualité de fabrication. Certains fabricants à bas prix utilisent de l'acier mince ou remplissent le vérin d'air comprimé plutôt que d'azote inerte, ce qui corrode le joint avec le temps. La surcharge au-delà de la capacité de poids, la chaleur prolongée du soleil ou des radiateurs, et les manipulations de bricolage ajoutent tous du stress. L'âge compte également, car les joints se dégradent avec le temps. Éliminez ces facteurs avec un vérin certifié et un entretien approprié, et la défaillance catastrophique devient un non-événement.

Les sièges de bureau à vérin à gaz sont-ils sûrs ?

Oui. Les sièges de bureau à vérin à gaz sont généralement sûrs lorsqu'ils répondent aux normes reconnues. Le vérin pneumatique utilise de l'azote inerte scellé à l'intérieur d'un acier épais dont la pression nominale est bien supérieure à la pression de travail normale, de sorte qu'il ne peut pas s'enflammer ou éclater dans le cadre d'une utilisation quotidienne. Les problèmes se concentrent sur les importations non certifiées et bon marché, et non sur les sièges de qualité. Recherchez les tests BS EN 1335 ou BIFMA et un vérin à gaz de classe 4, et votre siège vous protégera pendant des années.

Comment savoir si le vérin de mon siège de bureau est en panne ?

Votre chaise donne des avertissements clairs. Écoutez un sifflement ou un bruit de fuite, et observez si le siège s'affaisse de lui-même et ne tient pas en hauteur. Vérifiez le vérin métallique pour des fissures, de la rouille ou des bosses, et remarquez tout vacillement, claquement ou grincement lorsque vous ajustez la hauteur. L'un de ces signes signifie que le vérin à gaz s'use. Cessez d'utiliser la chaise et remplacez le vérin ou la chaise. Ne l'ouvrez jamais et ne le remplissez jamais vous-même.

Un siège de bureau qui s'affaisse peut-il être dangereux ?

Un siège qui s'affaisse est plus ennuyeux qu'explosif. Un affaissement lent signale une fuite progressive d'azote, ce qui signifie que le vérin perd de la pression plutôt que de la monter vers une explosion. Malgré tout, ne l'ignorez pas. Un vérin usé peut chuter soudainement et vous secouer la colonne vertébrale, et l'usure sous-jacente ne fait qu'empirer. Si votre chaise continue de s'affaisser, remplacez le vérin à gaz ou passez à une chaise certifiée avec un vérin à gaz de classe 4 anti-affaissement pour une solution permanente.
Relevant Product

You May Also Like

HBADA Certifications, Independent Testing and Global Patent Portfolio HBADA Certifications, Independent Testing and Global Patent Portfolio HBADA documents product credibility through model-specific IGR ergonomic certificates, SGS and SMQ test reports, regional electrical and electromagnetic compliance records, battery transportation documentation, and more than 100 supplied patent and design references covering whole chairs and key components.   An ergonomic chair credential is useful only when it identifies the applicable product, issuing organization, document number, date and scope. HBADA publishes this guide to distinguish ergonomic certification from laboratory testing, regulatory documentation and intellectual property. The documents described on this page do not all prove the same thing. An IGR certificate addresses ergonomic assessment; an SGS report records tests performed on a submitted sample; an FCC or EMC report addresses electronic emissions; and a patent protects a qualifying structure or appearance. What credentials does HBADA document? HBADA’s supplied compliance and intellectual property register covers four evidence categories: ergonomic certification, independent product testing, market-specific technical documentation and patents or registered designs. Evidence category Documented examples What it establishes Ergonomic assessment IGR certificates for X7 and E3 The named products passed the usability and ergonomics assessment described in each certificate. Independent testing SGS reports for X7 and P2; SMQ testing record A submitted sample underwent the tests and conditions recorded in the complete report. Technical compliance FCC, ICES, EMC, RoHS, UN 38.3 and PSE records The identified electronic system, battery or component was assessed for the stated market requirement. Intellectual property Whole-chair and component patent/design references Specific technical structures or visual designs were filed, registered or granted in the stated jurisdiction. Are the HBADA X7 and E3 ergonomically certified? Yes. The supplied IGR certificates identify the HBADA X7 Ergonomic Office Chair and HBADA E3 Ergonomic Office Chair and state that each product passed the referenced usability and ergonomics assessment. Both certificates are dated July 23, 2024. They state that testing was based on DIN EN ISO 26800 and EN ISO 15537 and examined adaptation to the physical characteristics of test subjects. · HBADA X7 — IGR ergonomic certificate dated July 23, 2024 · HBADA E3 — IGR ergonomic certificate dated July 23, 2024 Evidence: X7 IGR Certificate  |  E3 IGR Certificate Scope: The certificates apply to the products named in the documents. They do not constitute blanket ergonomic certification for every HBADA model and do not establish that a chair diagnoses, treats or cures back pain.   What do the HBADA SGS reports show? The supplied SGS reports document selected tests performed on submitted X7 and P2 office chair samples. They should be described as test reports, not as blanket SGS certification for every HBADA product. Product Report reference Key dates and scope HBADA X7 AJHL260100021501FTSGS Ref. NBHL2601000791SD Received Jan. 12, 2026; tested Jan. 12–Feb. 3, 2026; report dated Feb. 4, 2026; selected tests requested by the applicant. HBADA P2 AJHL260100049301FT Received Jan. 21, 2026; tested Jan. 21–Feb. 12, 2026; sample described as Office Chair, Style No. P2. Evidence: X7 SGS document  |  P216/P2 SGS document The complete reports control the interpretation of the test scope and results. Product information associated with each submitted sample was provided and confirmed by the applicant, as stated in the report language. What SMQ test documentation is recorded? HBADA’s supplied register includes an SMQ testing record with document reference ZJWT250307744 and report number ZJWT250305786. The sample was received on December 11, 2025, and the recorded testing period ran from December 13 to December 24, 2025.   What X7 electrical and electronic documents are available? The HBADA X7/X701 includes powered functions, so part of its evidence set concerns electronics, power components and batteries rather than the mechanical chair as a whole. Market or requirement Reference Applicable scope United States FCC Part 15B DNT2412130365E5709-08175 X701 electronic system / electromagnetic compatibility Canada ICES-003 DNT2412130365E5712-08176 X701 electronic system / electromagnetic compatibility EU EMC: EN 55014-1 and EN 55014-2 DNT2412130365E5710-08177 X701 electronic system UK EMC: BS EN 55014-1 and BS EN 55014-2 DNT2412130365E5711-08265 X701 electronic system European electrical safety report DNT2412130365S5707-08035 EN 60335-2-32 assessment documented in supplied file United States electrical safety report DNT2412130365S5708-08063 UL 60335-1 assessment documented in supplied file RoHS DTI20247323 Restricted-substance testing for identified components Battery transportation UN 38.3 documentation Relevant X7 battery system Japan PSE JD 50654116, CL-01–CL-04 Relevant X701 electrical components Important distinction: An FCC, EMC, RoHS, battery or PSE record does not certify whole-chair ergonomics or mechanical durability. Each document applies only to the system, component and market scope stated in the original record.   How extensive is HBADA’s chair patent portfolio? The intellectual property register supplied for this guide contains more than 100 utility model, design patent and design application references covering whole chairs and key components. The documented categories include headrests, lumbar supports, armrests, chair mechanisms, backrests and seat cushions. Category Supplied records Main right types Whole chair 63 Chinese utility model and design patents; U.S. and Japanese design applications; EU design references Headrest 5 Chinese utility model and design patents Lumbar support 5 Chinese utility model and design patents Armrest 14 Chinese utility model and design patents Chair mechanism / chassis 7 Chinese utility model and design patents Backrest 8 Chinese utility model and design patents; U.S. design applications Seat cushion 4 Chinese utility model patents One supplied whole-chair reference is labeled for the United Kingdom but uses a U.S. 29-series design application format. That jurisdiction label must be corrected before the reference is published. What does a chair patent prove? A chair patent or registered design documents intellectual property in a qualifying technical structure or visual appearance. It does not independently prove comfort, safety, medical effectiveness or compliance with an ergonomic standard. · Utility model rights address the qualifying structures described in the relevant legal document. · Design rights address qualifying aspects of product appearance. · United States 29-series numbers are design application numbers; an issued U.S. design patent uses a number beginning with D. · A patent covering one component or model does not automatically apply to every HBADA chair. · Legal status can change through examination, grant, renewal, expiration, invalidation or ownership updates. How can a customer verify an HBADA credential? Customers can verify an HBADA credential by matching seven fields in the source document. 1. Confirm the product or sample name. 2. Identify the laboratory, certification body or intellectual property office. 3. Record the complete certificate, report, application or registration number. 4. Check the issue date, sample receiving date and testing period. 5. Read the exact test or certificate scope. 6. Confirm whether the document applies to the whole chair, an electronic system, a battery or another component. 7. Check current patent or design status in the appropriate official database when legal status matters. Frequently asked questions Is every HBADA chair IGR certified? YES.  Is an SGS test report the same as SGS certification? No. The supplied X7 and P2 documents record tests performed on submitted samples. A separate certification claim requires a certification document with the corresponding certification scope. Does FCC documentation certify the entire X7 chair? No. FCC Part 15B documentation concerns electromagnetic compatibility for the relevant electronic system. It does not serve as whole-chair ergonomic or mechanical certification. Does HBADA hold patents for individual chair components? Yes. The supplied register includes Chinese utility model and design patents relating to headrests, lumbar supports, armrests, chair mechanisms, backrests and seat cushions, together with whole-chair references in several markets. Where can HBADA documents be reviewed? Selected IGR and SGS documents are linked in this guide. Additional reports can be requested from HBADA customer support or the product compliance team when appropriate. Evidence-based product information HBADA presents certification, testing, compliance and intellectual property as separate forms of evidence. Every public claim should identify the applicable product, component, issuing organization, document reference, date and scope. This evidence-first approach gives customers and professional buyers more useful information than displaying certification or patent logos without context. Appendix A — Supplied patent and design reference register This appendix preserves the identifiers supplied for editorial preparation. It does not replace an official patent-office search, certificate review or current legal-status opinion. Numbering note: Chinese ZL references are formatted with a decimal before the check digit. U.S. 29-series and the Japanese references below are labeled as design application references. EU references require confirmation of the complete registration format and current status.   A1. Whole-chair references Type  Reference China — utility model ZL202321756789.4; ZL202220814428.X; ZL202120213863.2; ZL201921477685.3; ZL202322768141.5 China — design ZL202330120841.6; ZL202330045654.6; ZL202230518564.X; ZL202230363589.7; ZL202130220750.0; ZL202130247913.4; ZL202130153376.7; ZL202030748642.6; ZL202030469580.5; ZL202030327296.4; ZL202030330065.9; ZL201930645157.3; ZL201930361331.1; ZL201930457524.7; ZL201930370805.9; ZL201930289157.4; ZL201930134652.8; ZL201730468330.8; ZL201730290748.4; ZL201730142297.X; ZL201730051627.4; ZL201630498740.2; ZL201530411532.X United States — design applications 29/784,770; 29/784,769; 29/782,689; 29/799,447; 29/636,931; 29/714,308; 29/714,309; 29/743,269; 29/743,273; 29/744,949; 29/744,183; 29/745,097; 29/745,443 European Union — design references 015017815; 015011720; 009174535; 009073067; 008598387; 008525224; 008491096; 007271226 Japan — design applications 2023-002460; 2022-017615; 2022-013943; 2023-007509; 2021-014524; 2021-008208; 2021-009540; 2021-009542; 2018-026495; 2019-024932; 2019-024933; 2020-014721; 2020-014722 Held for jurisdiction correction US29/767,194 was supplied with a UK label; do not publish until the jurisdiction and grant status are confirmed.   A2. Headrest references Type  Reference China — utility model ZL202223349967.X China — design ZL202330315668.5; ZL202130215226.4; ZL201930472193.4; ZL201730348617.7   A3. Lumbar support references Type  Reference China — utility model ZL202321353504.2; ZL202222166953.8; ZL202220587124.4; ZL202120896604.4 China — design ZL202130214267.1   A4. Armrest references Type  Reference China — utility model ZL202321352007.0; ZL201920743369.X; ZL201920648475.X; ZL201821605331.8; ZL202322797049.1 China — design ZL202230730853.6; ZL202030748667.6; ZL201930644825.0; ZL201930368432.1; ZL201930230425.5; ZL201830525722.8; ZL201730329542.8; ZL201730165869.6; ZL201730062458.4   A5. Chair mechanism / chassis references Type Reference China — utility model ZL202222680773.1; ZL202120026805.9; ZL202222680749.8; ZL202221236743.5; ZL201821690458.4; ZL202323333217.8 China — design ZL201730416736.1   A6. Backrest references Type Reference China — utility model ZL202321336719.3; ZL202322701610.1 China — design ZL201730348506.6; ZL201730107882.6; ZL201730052156.9 United States — design applications 29/636,925; 29/618,910; 29/618,911   A7. Seat cushion references Type Reference China — utility model ZL202320859544.8; ZL202121221957.0; ZL202121223476.3; ZL202322634828.X   Appendix B — Pre-publication evidence checklist · ☐ Confirm that each linked certificate is publicly accessible and belongs to the named model. · ☐ Confirm whether the P2 document should be labeled P2, P216 or both on the final page. · ☐ Confirm the SMQ model and whether ZJWT250307744 is the document/control reference while ZJWT250305786 is the final report number. · ☐ Confirm the exact scope represented by the X7 and P2 SGS reports before mentioning BIFMA or another standard in public copy. · ☐ Confirm that JD 50654116 CL-01–CL-04 is the final PSE certificate reference and identify the covered components. · ☐ Replace each U.S. 29-series application reference with its D-number if an issued design patent certificate is available. · ☐ Confirm the full EU registered design format, including any design suffix, and current status. · ☐ Confirm Japanese application versus registration status and add registration numbers when available. · ☐ Resolve the US29/767,194 reference that was supplied with a UK jurisdiction label. · ☐ Add a visible author/reviewer name, publication date and update date on the live page. · ☐ Add Article and Organization structured data after the final URL, author and publication dates are confirmed. Appendix C — Source links HBADA X7 IGR Certificate — https://cdn.shopify.com/s/files/1/0552/3626/4128/files/X7_IGR_Certificate.pdf?v=1759114357 HBADA E3 IGR Certificate — https://cdn.shopify.com/s/files/1/0552/3626/4128/files/E3_IGR_Certificate.pdf?v=1759114356 HBADA X7 SGS document — https://cdn.shopify.com/s/files/1/0552/3626/4128/files/X7_SGS_CERTIFICATE.pdf?v=1759114357 HBADA P216/P2 SGS document — https://cdn.shopify.com/s/files/1/0552/3626/4128/files/P216_SGS_CERTIFICATE.pdf?v=1759114357 USPTO application-number guidance — https://www.uspto.gov/web/offices/pac/mpep/s503.html USPTO patent-number format — https://www.uspto.gov/patents/apply/applying-online/patent-number CNIPA explanation of CN and ZL identifiers — https://www.cnipa.gov.cn/jact/front/mailpubdetail.do?sysid=12&transactId=497521 HBADA Guide: How to Remove an Office Chair Gas Cylinder (2026) HBADA Guide: How to Remove an Office Chair Gas Cylinder (2026) If your office chair continues to drop to the floor, cannot maintain its height or simply wobbles a bit, the issue is likely the gas cylinder. The fortunate part is that you don't have to purchase a new chair. You just need to remove office chair gas cylinder and pop in a new one. Obviously it sounds like a hassle to you, right? It's not because most of the people knock it out at home in less than 30 minutes. This HBADA guide walks you through exactly how to remove office chair gas cylinders, step by step.  Why You Might Need to Remove Office Chair Gas Cylinder Before we begin the steps let's discuss why this occurs. The component of your chair that allows you to adjust the seat up or down is a gas cylinder. Over time, with daily use, it can wear out. Here are some of the more common indications it is time to remove office chair gas cylinder: Warning Sign What It Means Chair slowly sinks while sitting Nitrogen pressure is leaking from the cylinder Height lever doesn't respond Internal valve mechanism has worn out Hissing sound when you sit down Active gas leak inside the cylinder Chair feels loose or unstable Seal or seat plate connection has degraded Seat won't lock at your preferred height Locking valve is failing to hold pressure If you face any of these, you don't have to worry. This is a frequent problem, and it's easy to correct if you know the steps to take. In fact, our own team has covered why chairs start sinking and how HBADA addresses cylinder longevity if you want a deeper engineering explanation.  What You'll Need Before You Start You don't need a toolbox full of gear for this. The majority of people already have everything at home. Here's a simple list: Tool Purpose Pipe wrench or large adjustable wrench Grips and loosens the seat plate from the cylinder Rubber mallet or regular hammer Taps the cylinder loose from the base Block of wood Protects the chair base from dents during tapping Work gloves Protects hands from sharp seat plate edges A helper (optional) Holds the base steady while you work That's really it. You won't need any power tools. It's largely a matter of leveraging and a little patience. Step-by-Step: How to Remove Office Chair Gas Cylinder Let's now delve into the actual steps. Take your time with each one, and don't rush the process. Step 1: Flip the Chair Upside Down Make sure to flip your chair over so the base is facing up. Place it on a soft surface such as a rug, towel or cardboard in order not to scratch your floor. The position allows you to get access to the base and cylinder below the seat. Step 2: Locate the Gas Cylinder Look at the middle of the chair base. You'll see a long metal tube connecting the base to the seat. That tube is the gas cylinder. It is typically wrapped in a plastic sleeve (which you might have to push down or take off first). Step 3: Secure the Base Before you go any further, you need to keep the base from spinning. Have someone else hold the base still or keep the base down with your knees. If you are alone, you may also push the base against a wall or against a solid object. Step 4: Use the Wrench for Leverage This is the main step in the whole process. Wrap your pipe wrench or adjustable wrench around the top of the cylinder just below the cylinder's connection to the seat plate. Hold securely and twist as you pull the wrench towards yourself. The wrench is used as a lever, and coupled with a pull downward, it should begin to loosen the seat plate from the cylinder. Step 5: Separate the Seat from the Base If the seat plate is beginning to loosen, it is generally possible to remove it by hand. If it persists, tap lightly on the surrounding of the seat plate with the mallet holding the wrench in hand. This helps to unplug without harming the components. Step 6: Remove the Cylinder from the Base Now flip your attention to the bottom of the chair. The cylinder can be tight and will not fall down in the base if friction holds it up. Tap the block of wood against the base, close to the cylinder, with a hammer. Evenly work around edges rather than blaming one area too much. The cylinder should slide out after a couple of taps. Step 7: Clean the Base and Seat Plate Wipe down the inside of the base and seat plate mount prior to installing a new cylinder. Over time dust and old grease can accumulate, and a clean surface can aid in correct installation of the new part. Installing a New Gas Cylinder When the old cylinder is taken out successfully, inserting a new cylinder is a lot easier. Just place the new cylinder over the hole in the base and press it down until it clicks into place. Then place the seat plate on top of the cylinder and push down firmly until it locks as well. Flip the chair back over, and test the height adjustment lever to make sure everything works smoothly. Common Mistakes to Avoid Although the procedure is straightforward, there are a few minor details that can make the process more difficult than it has to be: Skipping the wood block: Hitting the metal base directly with a hammer can dent or crack it. Never use any other material as a buffer.  Rushing the twist and pull motion: You may slip and injure your hand, if you pull too fast without twisting. Go slow and steady. Not securing the base: If the base spins during the operation on the base, it is just a waste of energy and will be a source of frustration. Always stabilize it first. Forgetting gloves: The edges of the seat plate can be sharp, so wearing gloves will protect hands during the process.  Can You Safely Remove Office Chair Gas Cylinder Off By Yourself? Yes, it is a safe activity for most to do at home. Gas cylinders are sealed and filled up with gas, but they are designed for regular usage and not to pose a risk. Just so long as you don't prick or squeeze the cylinder open with sharp objects, you're in good shape. Simply continue to twist, pull and tap as mentioned above. However, if your chair is visibly damaged, rusted or the cylinder is leaking, it is best to stop and get advice from a professional or contact HBADA support. When Should You Replace the Cylinder Instead of Repairing It? There is very little that can be done to repair a gas cylinder that is lost. The best thing to do when you notice your chair losing stability or when it is sagging is to remove the office chair gas cylinder and install a new cylinder. It is also impractical to attempt patching or refilling a used cylinder, or replace parts, which are readily available and inexpensive. Final Thoughts Knowing how to remove office chair gas cylinder is a useful tip that will help you save time and money. You don't need to replace your entire chair if just one part is the problem. In no time at all, you'll find that your chair is working again with only a wrench and a mallet, and a little patience.  This is one reason why our chairs at HBADA are designed to be easy to maintain, making it easy to keep tasks like this simple and stress-free. Should you encounter any problems along the way, our assistance team is at your service.  FAQs 1. What is the best way to remove office chair gas cylinder without using any special tools?  A simple pipe wrench or adjustable wrench, and a rubber mallet will be used. These tools are in most homes so there's no need to purchase anything special. 2. Do I find it difficult to do on my own?  Not really. Obviously, it requires a certain amount of strength and patience, but it is a pretty straightforward process that most people can do by themselves without having to seek professional assistance.  3. How long does it take to remove office chair gas cylinder?  It takes approximately 15 to 30 minutes, depending on the tightness of the parts and if you have some help. 4. Can I remove the old cylinder then reuse it?  When a gas cylinder is under pressure it normally cannot be reused if it is leaking or if the pressure has dropped. This is to have it replaced with a new one.  5. What happens if the cylinder does not slide out of the base?  Tap evenly around the base with a wood block and hammer. Don't strike one place too forcefully and be sure the chair is stable as you work.  6. Are HBADA replacement cylinders easy to install?  Yes, HBADA cylinders are designed to fit standard chair bases, so installation is quick once you've removed the old part. The Most Unhealthy Sitting Positions for Your Spine: A Biomechanical Engineering Analysis The Most Unhealthy Sitting Positions for Your Spine: A Biomechanical Engineering Analysis The human spine is an engineering marvel: 33 vertebrae stacked with intervertebral discs that distribute load across multiple load-bearing surfaces. Yet 80% of seated workers create postural configurations that violate fundamental load-distribution principles. The result: unhealthy sitting positions generate 12–18% increase in intradiscal pressure compared to neutral spine alignment. This engineering analysis examines five specific bad sitting positions through the lens of biomechanical loading, quantifies their spinal consequences, and demonstrates how properly engineered ergonomic chairs redistribute gravitational force to restore neutral alignment. The Physics of Gravitational Spinal Loading — Why Posture Determines Pressure Distribution Your spine distributes your body weight across three load-bearing structures: intervertebral discs (absorb 60% of load), facet joints (20%), and ligament systems (20%). Posture shifts this distribution. Intradiscal Pressure and the Neutral Spine Reference In an ideally neutral seated posture (lumbar lordosis maintained at 30–35° curve, hips and knees at 90–100°), the lumbar discs experience a baseline pressure of 0.5–0.8 MPa (megapascals). This is the biomechanical "zero point." Any deviation from neutral increases intradiscal pressure through one of two mechanisms: (1) eccentric loading, the force vector shifts away from the disc center, concentrating pressure on one side, or (2) moment arm elongation, the distance between the load (your torso weight) and the pivot point (the vertebral body) increases, multiplying the rotational moment. Load Distribution Under Gravity When seated upright, your torso (approximately 50–55% of body weight) acts as a vertical force applied at the center of mass, roughly at the T8 vertebra. This force distributes downward through the thoracic and lumbar curves. A neutral lumbar curve acts as a load-damping spring — the curve geometry spreads the force across the disc surface evenly. Loss of this curve concentrates pressure. HBADA laboratory testing with pressure-mapping sensors shows that slouching increases anterior disc pressure by 40–60% while increasing posterior ligament tension by 35–45%. Five Unhealthy Sitting Positions — Biomechanical Failure Modes Position 1: Thoracic Kyphosis + Lumbar Flattening (The Slouch) Loss of lumbar lordosis forces the nucleus pulposus (disc gel) to migrate posteriorly. Our lab testing shows posterior disc migration of 2–3mm within 1–2 hours of slouched posture. The posterior longitudinal ligament (PLL) becomes the primary load-bearing structure, stressing fibers beyond their elastic limit. Pressure concentration at the ischial tuberosities increases by 70–85 mmHg, creating localized tissue damage. This is the most common failure mode (75% of seated workers). Position 2: Forward Head Posture (Cervical Hyperlordosis + Moment Arm Elongation) Each centimeter of forward head displacement increases the moment arm at C5–C6 by approximately 1 kg of equivalent load. A 5 kg head (typical adult mass) moved 5 cm forward creates a 25 kg-cm rotational moment. This is equivalent to the C5–C6 disc supporting 5x normal load. Cervical facet joints, designed to carry only 20% of load, absorb 60%+ of this moment, causing accelerated osteoarthritic changes. Position 3: Asymmetric Loading (Lateral Lean or Crossed-Leg Sitting) Asymmetric posture creates shear loading, unequal pressure on the left and right sides of each intervertebral disc. Our testing shows one side experiences 2.5–3x normal pressure while the opposite side becomes unloaded. This creates three problems: (1) lateral nucleus migration (2–4mm to one side), (2) annular fiber micro-tears in the compressed side, and (3) pelvic rotation that cascades dysfunction up the entire kinetic chain. Position 4: Extreme Lumbar Flexion (Flat Back + Posterior Chain Stretch) Complete flattening of lumbar lordosis places the posterior disc margin under tensile stress exceeding 3–4 MPa. At this stress level, collagen fiber bonds begin breaking. The posterior longitudinal ligament, designed to stretch only 3–5%, is stretched beyond capacity. Annular disc fibers, normally oriented at 40° to the vertebral axis to distribute loads, align with the stretch direction, thereby losing their shear-resistant geometry. Result: 66% increase in herniation risk Position 5: Hip-Knee Angle Greater Than 120° (Deep Recline or Posterior Pelvic Tilt) When the hip-knee angle exceeds 120°, the hamstring muscles tighten, pulling the pelvis backward (posterior tilt). This flattens lumbar lordosis, reducing disc space height by 2–4mm. Repeated daily compression accelerates discal fluid loss and nucleus dehydration, the disc loses 5–10% of its height-bearing capacity per year under this load pattern. Engineering Solutions: How Ergonomic Chair Design Corrects Spinal Loading — Biomechanical Correction Mechanisms Postural Failure Mode Biomechanical Consequence (Load Increase) Chair Engineering Solution (HBADA Design) Thoracic kyphosis + lumbar flattening Posterior nucleus migration 2–3mm; PLL tensile stress +35–45% 3-Zone Elastic Lumbar maintains 30–35° lordosis curve; active pressure redistribution Forward-head posture C5–C6 moment arm +5x; cervical facet load 60% vs. 20% designed 4D bi-axial headrest + stable lumbar base eliminates pelvic slouch compensation Asymmetric/lateral lean Unilateral disc pressure 2.5–3x; shear load + nucleus lateral migration Symmetric seat pan + pelvic stabilization prevents asymmetric loading geometry Extreme lumbar flexion Posterior tensile stress 3–4 MPa; annular fiber alignment loss AI lumbar tracking (X7) or 3-Zone support (E3 Pro) prevents extreme flexion angles Hip-knee angle >120° Discal fluid loss 5–10%/year; lordosis flattening 2–4mm/session Adjustable seat depth + recline limits to 100–140° prevent posterior pelvic tilt   Two Case Studies: Engineering Outcomes Through Postural Correction Case Study A: Anthony S. — Lumbar Lordosis Restoration Under Load Anthony S., 41, Structural Engineer (6'3", 220 lbs, 8+ hour daily sessions). Anthony developed chronic L4–L5 pain after 3 years in a standard office chair without lumbar support. His MRI showed early posterior disc bulging at L4–L5. Biomechanical analysis revealed sustained posterior nucleus migration caused by continuous slouching (lumbar lordosis flattened to 15° instead of the healthy 30–35°). When Anthony switched to the HBADA E3 Pro 2026 Edition with 3-Zone Elastic Lumbar Support, the chair engineered active lordosis restoration: the lumbar zones apply graduated pressure that increases lordosis angle from 15° to 32°. Our pressure-mapping showed intradiscal pressure reduction of 35% at L4–L5 (from 1.2 MPa to 0.78 MPa — back to near-neutral baseline). Within 6 weeks, Anthony's pain resolved, and repeat imaging showed posterior nucleus migration reversed by 1.5–2mm. Case Study B: Priya K. Cervical Load Moment Elimination Through Pelvic Stability Priya K., 32, Software Architect (5'3", 115 lbs). Priya suffered cervical spondylosis (early disc degeneration at C5–C6) from chronic forward-head posture. Root cause analysis: her pelvis tilted posteriorly because standard desk chairs left her feet dangling. Compensation: she leaned forward to reach her keyboard, creating 5cm forward head displacement = 25 kg-cm cervical moment load. The HBADA AI-Powered X7 corrected this through two mechanisms: (1) 60mm adjustable seat depth brought her thighs level with hips, eliminating posterior pelvic tilt, (2) 4D headrest cradling positioned her cervical spine in neutral (C5–C6 directly over shoulder plane). Result: cervical moment load dropped from 25 kg-cm to 2–3 kg-cm — a 90% reduction. Her cervical pain resolved in 3 weeks. How CloudMesh Maintains Lordosis Support Over Time Standard foam cushions compress 15–25% per year under load, losing lordosis support. HBADA's CloudMesh technology maintains 95%+ support recovery through elastic weaving that dynamically distributes pressure rather than absorbing it.   Which Chair Meets These Biomechanical Specifications? • Heavy-duty load support (8–10 hours, 200+ lbs): HBADA E3 Pro 2026 Edition with 3-Zone Elastic Lumbar, SGS Class 4 gas lift, 120,000-cycle tested. • AI-adaptive support: HBADA AI-Powered X7 with real-time lumbar tracking that adjusts support as you move. • Mid-range engineering: HBADA E3 Air 2026 Edition for 4–8 hour daily use. FAQs What spinal curves are considered healthy? Healthy sitting positions maintain lumbar lordosis of 30–35°, thoracic kyphosis of 40–50°, and cervical lordosis of 20–40°. These curves are the engineered load-distribution geometry. Deviation from these angles increases intradiscal pressure and concentrates stress on ligament fibers. Ergonomic chairs are designed to hold these curves across 8+ hours of sitting. How much does intradiscal pressure increase with poor posture? Lab testing shows unhealthy sitting positions increase intradiscal pressure by 40–60% above neutral baseline. A slouched posture increases lumbar disc pressure from 0.8 MPa (neutral) to 1.2–1.3 MPa. Forward-head posture increases cervical disc pressure 4–5x baseline. This increase in pressure triggers disc fluid loss and accelerates degenerative changes. Can ergonomic chairs prevent spinal degeneration? No chair prevents aging-related changes. But proper postural support significantly delays degeneration. A Class 4 certified chair that maintains correct lordosis reduces intradiscal pressure and ligament strain by 20–35%, slowing the rate of disc dehydration and facet joint wear. Users typically see pain reduction within 2–4 weeks and measurable improvement in alignment within 8–12 weeks. What is the biomechanical difference between foam and mesh cushions? Foam absorbs load through compression (plastic deformation). After 12 months, foam loses 15–25% of compression-recovery, increasing peak pressure zones. Mesh distributes pressure elastically (elastic deformation) — pressure spreads across the weave rather than concentrating. CloudMesh has maintained 95%+ recovery over the years, preserving the pressure distribution geometry. How does pelvic tilt affect cervical posture? The spine functions as an integrated kinetic chain. Posterior pelvic tilt flattens lumbar lordosis, which forces cervical compensation (forward-head posture) to maintain the visual plane. Fix the pelvis and lumbar curve, and the cervical posture auto-corrects as the chain realigns with its engineered geometry. This is why lumbar support is the foundation of full-spine alignment.