
Blog

Le posizioni sedentarie più dannose per la tua colonna vertebrale: un'analisi di ingegneria biomeccanica

Le posizioni sedentarie più dannose per la tua colonna vertebrale: un'analisi di ingegneria biomeccanica

La colonna vertebrale umana è un miracolo di ingegneria: 33 vertebre impilate con dischi intervertebrali che distribuiscono il carico su molteplici superfici portanti. Eppure l’80% dei lavoratori seduti crea configurazioni posturali che violano i principi fondamentali di distribuzione del carico. Il risultato: malsane seduta posizioni generare aumento del 12–18% della pressione intradiscale rispetto all’allineamento neutro della colonna. Questa analisi ingegneristica esamina cinque specifiche posizioni di seduta scorrette attraverso la lente del carico biomeccanico, quantifica le loro conseguenze spinali e dimostra come sedie ergonomiche progettate correttamente redistribuiscono la forza gravitazionale per ripristinare l’allineamento neutro.

La fisica del carico spinale gravitazionale — perché la postura determina la distribuzione della pressione

La tua colonna vertebrale distribuisce il peso corporeo su tre strutture portanti: dischi intervertebrali (assorbono il 60% del carico), articolazioni faccette (20%) e sistemi legamentosi (20%). La postura modifica questa distribuzione.

Pressione intradiscale e riferimento della colonna neutra

In una postura seduta idealmente neutra (lordosi lombare mantenuta a una curva di 30–35°, anche e ginocchia a 90–100°), i dischi lombari sperimentano una pressione di base di 0,5–0,8 MPa (megapascal). Questo è il "punto zero" biomeccanico. Qualsiasi deviazione dalla posizione neutra aumenta la pressione intradiscale attraverso uno dei due meccanismi: (1) carico eccentrico, il vettore di forza si sposta lontano dal centro del disco, concentrando la pressione su un lato, oppure (2) allungamento del braccio del momento, la distanza tra il carico (il peso del torso) e il punto di pivot (il corpo vertebrale) aumenta, moltiplicando il momento rotazionale.

Distribuzione del carico sotto gravità

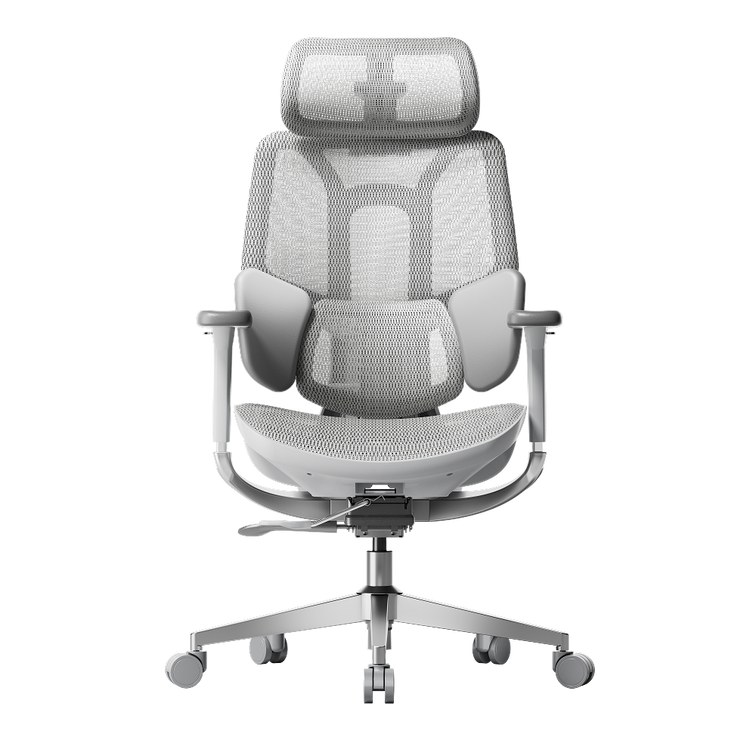
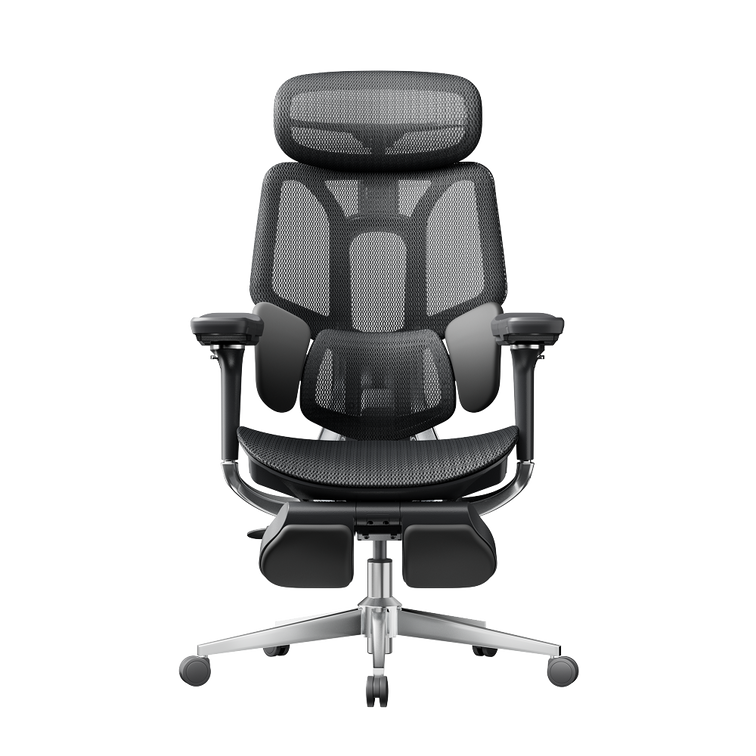
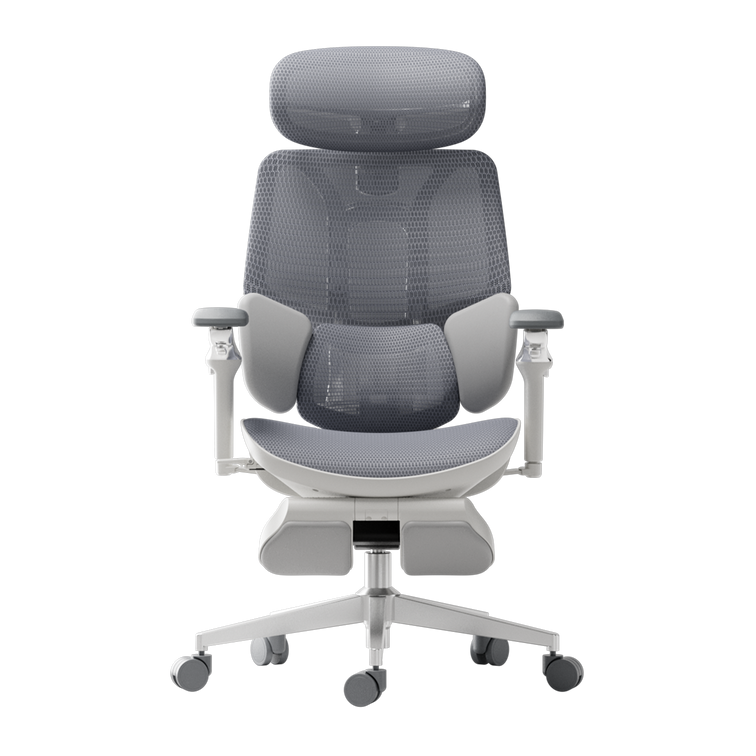
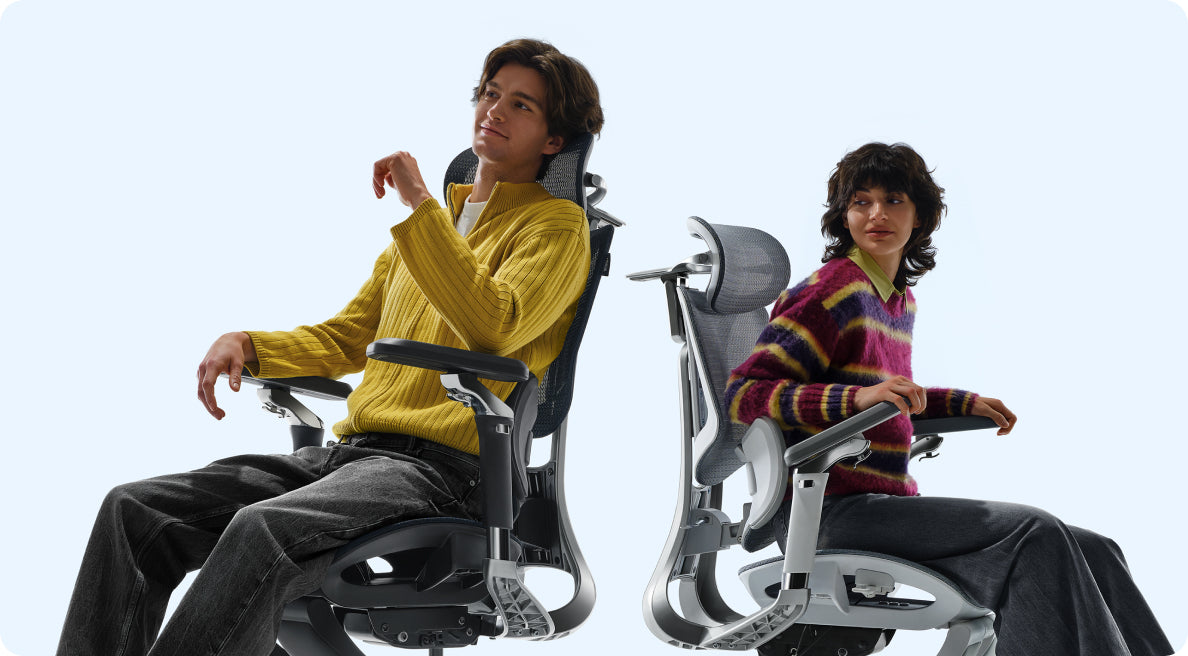
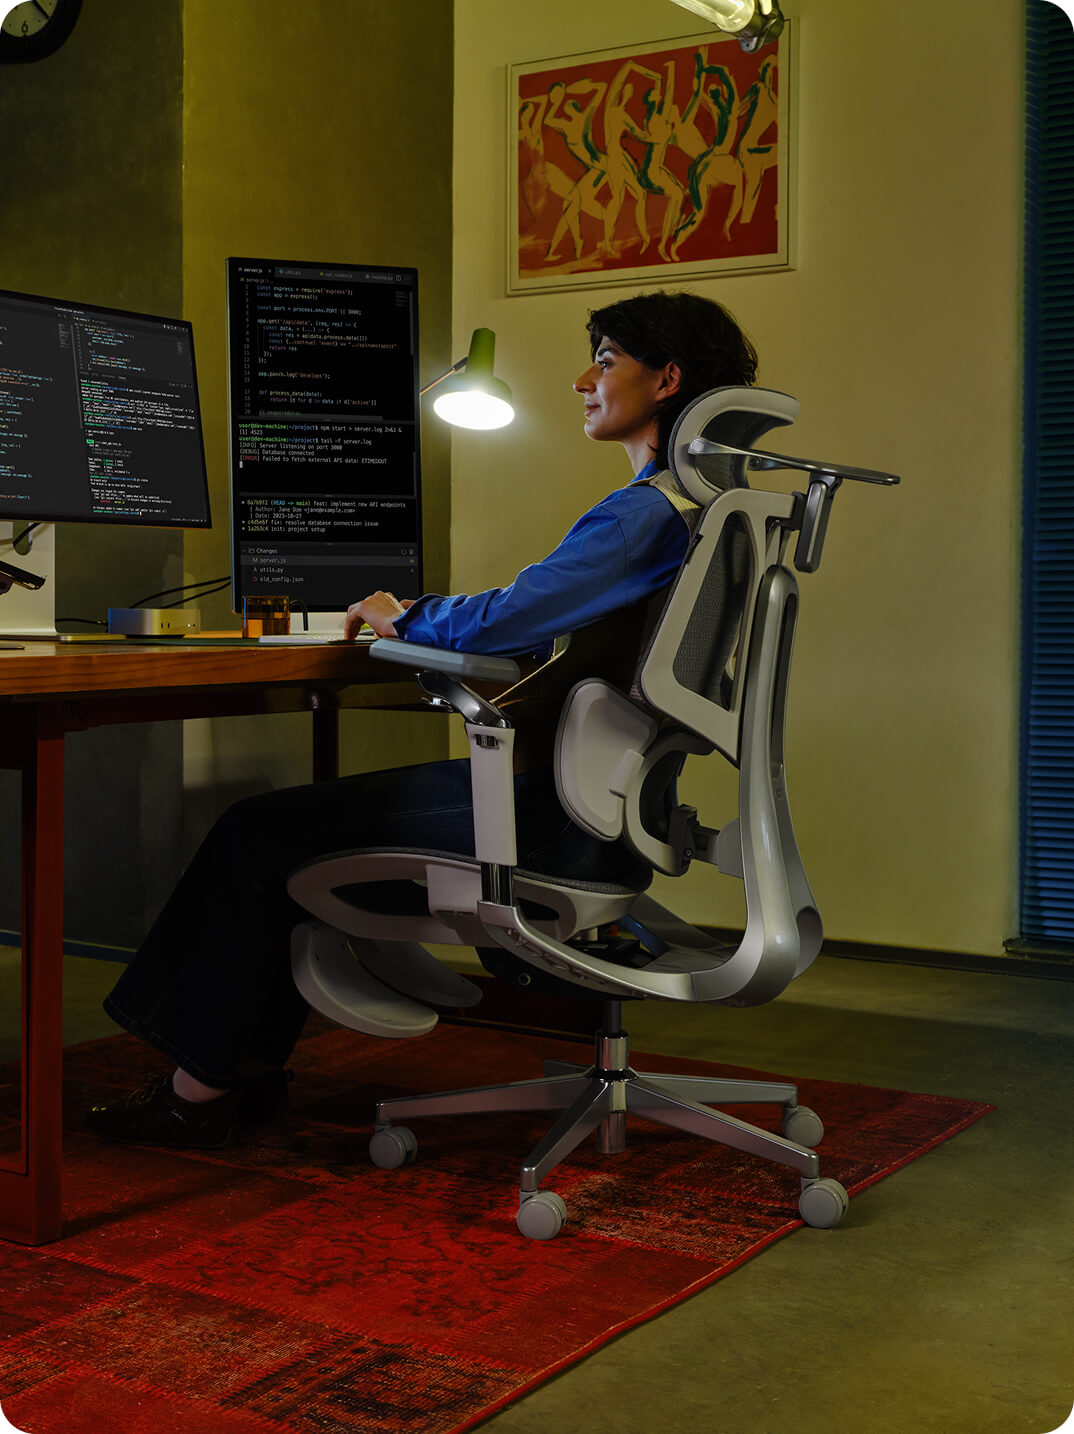
hbada vs sihoo sedia da ufficio ergonomica reddit

Quando si è seduti in posizione eretta, il torso (circa il 50–55% del peso corporeo) agisce come una forza verticale applicata al centro di massa, approssimativamente alla vertebra T8. Questa forza si distribuisce verso il basso attraverso le curve toracica e lombare. Una curva lombare neutra agisce come una molla ammortizzante del carico — la geometria della curva distribuisce la forza uniformemente sulla superficie del disco. La perdita di questa curva concentra la pressione. I test di laboratorio HBADA con sensori di mappatura della pressione mostrano che la postura curva aumenta la pressione anteriore del disco del 40–60% mentre aumenta la tensione del legamento posteriore del 35–45%.

Cinque posizioni di seduta malsane — modalità di guasto biomeccanico

Posizione 1: Cifosi toracica + appiattimento lombare (La postura curva)

La perdita della lordosi lombare costringe nucleo polposo (gel del disco) a migrare posteriormente. I nostri test di laboratorio mostrano migrazione posteriore del disco di 2–3 mm entro 1–2 ore di postura curva. Il legamento longitudinale posteriore (PLL) diventa la struttura portante principale, stressando le fibre oltre il loro limite elastico. La concentrazione di pressione sulle tuberosità ischiatiche aumenta del 70–85 mmHg, causando danni localizzati ai tessuti. Questo è il modalità di fallimento più comune (75% dei lavoratori seduti) .

Posizione 2: postura con testa in avanti (iperlordosi cervicale + allungamento del braccio di momento)

Ogni centimetro di spostamento in avanti della testa aumenta il braccio di momento a C5–C6 di circa carico equivalente a 1 kg . Una testa di 5 kg (massa tipica adulta) spostata in avanti di 5 cm crea un un momento rotazionale di 25 kg-cm . Questo equivale al disco C5–C6 che supporta 5 volte il carico normale . Le articolazioni faccettarie cervicali, progettate per sopportare solo il 20% del carico, assorbono oltre il 60% di questo momento, causando cambiamenti osteoartrosici accelerati.

Posizione 3: carico asimmetrico (inclinazione laterale o seduta a gambe incrociate)

La postura asimmetrica crea carico di taglio, pressione diseguale sui lati sinistro e destro di ogni disco intervertebrale . I nostri test mostrano che un lato subisce una pressione 2,5–3 volte superiore al normale mentre il lato opposto si scarica. Questo crea tre problemi: (1) migrazione laterale del nucleo  (2–4 mm da un lato), (2) micro-lacerazioni delle fibre anulari nel lato compresso, e (3) rotazione pelvica  che causa una disfunzione a cascata lungo tutta la catena cinetica.

Posizione 4: flessione lombare estrema (schiena piatta + stiramento della catena posteriore)

L’appiattimento completo della lordosi lombare pone il margine posteriore del disco sotto stress di trazione superiore a 3–4 MPa . A questo livello di stress, i legami delle fibre di collagene iniziano a rompersi. Il legamento longitudinale posteriore, progettato per allungarsi solo del 3–5%, viene stirato oltre la capacità. Le fibre anulari del disco, normalmente orientate a 40° rispetto all’asse vertebrale per distribuire i carichi, si allineano con la direzione dello stiramento, perdendo così la loro geometria resistente al taglio. Risultato: Aumento del 66% del rischio di ernia

Posizione 5: Angolo anca-ginocchio superiore a 120° (reclinazione profonda o inclinazione pelvica posteriore)

Quando l’angolo anca-ginocchio supera i 120°, i muscoli posteriori della coscia si tendono, tirando il bacino indietro (inclinazione posteriore). Questo appiattisce la lordosi lombare, riducendo l’altezza dello spazio discale di  2–4 mm . La compressione ripetuta quotidiana accelera perdita di fluido discale  e Disidratazione del nucleo , il disco perde il 5–10% della sua capacità portante ogni anno sotto questo schema di carico.

Soluzioni ingegneristiche: come il design ergonomico della sedia corregge il carico spinale — meccanismi di correzione biomeccanica

Modalità di fallimento posturale

Conseguenza biomeccanica (aumento del carico)

Soluzione ingegneristica per sedie (Design HBADA)

Cifosi toracica + appiattimento lombare

Migrazione posteriore del nucleo 2–3 mm; stress di trazione del legamento longitudinale posteriore +35–45%

Zona lombare elastica a 3 zone mantiene la curva lordotica a 30–35°; ridistribuzione attiva della pressione

Postura con testa in avanti

Braccio di momento C5–C6 +5x; carico sulle faccette cervicali 60% vs. 20% progettato

Poggiatesta biassiale 4D + base lombare stabile elimina la compensazione da slouch pelvico

Inclinazione asimmetrica/laterale

Pressione discale unilaterale 2,5–3x; carico di taglio + migrazione laterale del nucleo

Sedile simmetrico + stabilizzazione pelvica prevengono geometrie di carico asimmetriche

Flessione lombare estrema

Stress tensivo posteriore 3–4 MPa; perdita di allineamento delle fibre anulari

Tracciamento lombare AI (X7) o supporto a 3 zone (E3 Pro) prevengono angoli di flessione estremi

Angolo anca-ginocchio >120°

Perdita di fluido discale 5–10%/anno; appiattimento della lordosi 2–4 mm/sessione

Profondità del sedile regolabile + limiti di inclinazione a 100–140° prevengono l'inclinazione pelvica posteriore


Due Casi di Studio: Risultati Ingegneristici Attraverso la Correzione Posturale

Caso di Studio A: Anthony S. — Ripristino della Lordosi Lombare Sotto Carico

Anthony S., 41 anni, Ingegnere Strutturale (1,90 m, 100 kg, sessioni giornaliere di oltre 8 ore). Anthony ha sviluppato dolore cronico a L4–L5 dopo 3 anni su una sedia da ufficio standard senza supporto lombare. La sua risonanza magnetica ha mostrato un rigonfiamento discale posteriore precoce a L4–L5. L'analisi biomeccanica ha rivelato una migrazione posteriore sostenuta del nucleo causata da una continua postura curva (lordosi lombare appiattita a 15° invece dei sani 30–35°).

Quando Anthony è passato a HBADA E3 Pro Edizione 2026 con Supporto Lombare Elastico a 3 Zone, la sedia ha progettato un ripristino attivo della lordosi: le zone lombari applicano una pressione graduata che aumenta l'angolo di lordosi da 15° a 32°. La nostra mappatura della pressione ha mostrato riduzione della pressione intradiscale del 35% a L4–L5 (da 1,2 MPa a 0,78 MPa — tornando vicino al valore basale neutro). Entro 6 settimane, il dolore di Anthony si è risolto e le immagini ripetute hanno mostrato una migrazione posteriore del nucleo invertita di 1,5–2 mm.

Caso di Studio B: Priya K. Eliminazione del Momento di Carico Cervicale Attraverso la Stabilità Pelvica

Priya K., 32 anni, Architetto Software (1,60 m, 52 kg)Priya soffriva di spondilosi cervicale (degenerazione precoce del disco a C5–C6) a causa di una postura cronica con la testa in avanti. Analisi della causa principale: il suo bacino era inclinato posteriormente perché le sedie da scrivania standard lasciavano i suoi piedi penzoloni. Compensazione: si sporgeva in avanti per raggiungere la tastiera, creando spostamento della testa in avanti di 5 cm = carico del momento cervicale di 25 kg-cm.

Il HBADA AI-Powered X7 ha corretto questo tramite due meccanismi: (1) profondità del sedile regolabile di 60 mm ha portato le sue cosce allo stesso livello dei fianchi, eliminando l'inclinazione pelvica posteriore, (2) poggiatesta 4D che avvolge ha posizionato la sua colonna cervicale in posizione neutra (C5–C6 direttamente sopra il piano delle spalle). Risultato: il carico del momento cervicale è sceso da 25 kg-cm a 2–3 kg-cm — una riduzione del 90%. Il suo dolore cervicale si è risolto in 3 settimane.

Come CloudMesh Mantiene il Supporto della Lordosi nel Tempo

I cuscini in schiuma standard si comprimono del 15-25% all'anno sotto carico, perdendo il supporto della lordosi. La tecnologia CloudMesh di HBADA mantiene oltre il 95% del recupero del supporto grazie a una tessitura elastica che distribuisce dinamicamente la pressione invece di assorbirla.


Quale sedia soddisfa queste specifiche biomeccaniche?

• Supporto per carichi pesanti (8–10 ore, oltre 90 kg): HBADA E3 Pro Edizione 2026 con supporto lombare elastico a 3 zone, sollevatore a gas SGS Classe 4, testato per 120.000 cicli.

• Supporto adattivo AI: HBADA AI-Powered X7 con tracciamento lombare in tempo reale che regola il supporto mentre ti muovi.

• Ingegneria di fascia media: HBADA E3 Air Edizione 2026 per un uso quotidiano da 4 a 8 ore.

Domande frequenti

Quali curve spinali sono considerate sane?

Salute posizioni sedute mantenere una lordosi lombare di 30–35°, una cifosi toracica di 40–50° e una lordosi cervicale di 20–40°. Queste curve sono la geometria progettata per la distribuzione del carico. Deviazioni da questi angoli aumentano la pressione intradiscale e concentrano lo stress sulle fibre legamentose. Le sedie ergonomiche sono progettate per mantenere queste curve per oltre 8 ore di seduta.

Di quanto aumenta la pressione intradiscale con una postura scorretta?

I test di laboratorio mostrano posizioni sedute non salutari aumentano la pressione intradiscale del 40–60% rispetto al valore neutro di base. Una postura curva aumenta la pressione sui dischi lombari da 0,8 MPa (neutra) a 1,2–1,3 MPa. La postura con testa in avanti aumenta la pressione sui dischi cervicali di 4–5 volte rispetto al valore di base. Questo aumento di pressione provoca la perdita di liquido dal disco e accelera i cambiamenti degenerativi.

Le sedie ergonomiche possono prevenire la degenerazione spinale?

Nessuna sedia previene i cambiamenti legati all'invecchiamento. Ma un corretto supporto posturale ritarda significativamente la degenerazione. Un Sedia certificata Classe 4 che mantiene la lordosi corretta riduce la pressione intradiscale e la tensione legamentosa del 20–35%, rallentando il tasso di disidratazione del disco e l'usura delle articolazioni faccettarie. Gli utenti solitamente notano una riduzione del dolore entro 2–4 settimane e un miglioramento misurabile nell'allineamento entro 8–12 settimane.

Qual è la differenza biomeccanica tra cuscini in schiuma e in rete?

La schiuma assorbe il carico tramite compressione (deformazione plastica). Dopo 12 mesi, la schiuma perde il 15–25% della capacità di recupero dalla compressione, aumentando le zone di pressione massima. La rete distribuisce la pressione elasticamente (deformazione elastica) — la pressione si diffonde attraverso la trama invece di concentrarsi. CloudMesh ha mantenuto oltre il 95% di recupero nel tempo, preservando la geometria della distribuzione della pressione.

Come influisce l'inclinazione pelvica sulla postura cervicale?

La colonna vertebrale funziona come una catena cinetica integrata. L'inclinazione pelvica posteriore appiattisce la lordosi lombare, costringendo la compensazione cervicale (postura con testa in avanti) per mantenere il piano visivo. Correggi il bacino e la curva lombare, e la postura cervicale si autocorregge mentre la catena si riallinea con la sua geometria progettata. Ecco perché supporto lombare è la base per l'allineamento completo della colonna vertebrale.
Prodotto rilevante

Potrebbe piacerti anche

How to Test an Ergonomic Office Chair During a 30-Day Home Trial How to Test an Ergonomic Office Chair During a 30-Day Home Trial The quick answer To test an ergonomic office chair during a 30-day home trial, use it for your real work each day and check fit, lumbar support, breathability, recline, armrests and noise. Keep the packaging, avoid damage, and decide before the window closes. If the chair does not suit you, contact support early enough to complete the required return steps within the applicable deadline. Table of Contents Jump to the part of the trial you need. 01. What is a 30-day home trial? 02. How should you set up the chair? 03. What should you test in week one? 04. What should you test in weeks two to four? 05. How do you protect return eligibility? 06. What are your EU return rights? 07. Which HBADA chairs can you test? 08. Your 30-day test plan 09. Limitations and when to get help 10. Conclusion 11. Frequently asked questions 12. Sources and useful links What Is a 30-Day Home Trial and How Does It Work? A home trial is a return window that lets you assess the chair in your real setup. HBADA EU’s current return and refund policy provides a 30-day satisfaction guarantee from receipt, subject to its terms. This commercial offer does not limit your statutory consumer rights. This gives you time to judge an adjustable ergonomic chair at your own desk, not in a showroom. Testing may help you find a more comfortable sitting position, but it is not a medical treatment. How Should You Set Up the Chair for Testing? Start well, because a fair test needs a proper setup. Assemble the chair using the HBADA user manual and assembly guide, and keep every part of the packaging, including the box, foam and spare hardware. Then set it to your body before you judge it. Set the seat height so your feet rest flat on the floor or a suitable footrest. Set the seat depth so two to three fingers fit behind your knees. Set the lumbar support to meet your lower back. Set the armrests so your forearms are supported and your shoulders stay relaxed. Check that you can reach your keyboard and mouse comfortably. Only after this setup should you decide how the chair feels. What Should You Test in the First Week? Your first week is about first impressions and daily fit. Fit: Check you can reach a feet-flat, back-supported position within the chair’s adjustment ranges. Lumbar support: Notice whether the support meets your lower back through your normal workday. Breathability: Watch for heat build-up and check whether the mesh and seat feel comfortable in your room. Noise and castors: Roll across your floor and listen for creaks or scuffs. Check that the castors are suitable for the surface. What Should You Test in Weeks Two to Four? Later weeks reveal how the chair holds up over real work. Now test the chair as an office chair for long hours. Work a normal week, keeping your usual movement breaks, and notice whether early comfort lasts into the afternoon. Move through the available recline positions and check that the locks hold. Use the armrests while you type, write and relax. Give yourself time to learn the controls and fine-tune the settings, but do not treat pain as a required adjustment phase. If discomfort eases after a setting change, note what helped. If it persists after reasonable adjustments, the chair may not fit you. A Quick Test-and-Decide Table Use this table to turn each check into a clear next step. What to test How to test it Keep or return signal Fit Set seat height, depth and lumbar support to your body, then sit back fully. Consider a return if you cannot achieve supported feet and back within the adjustment ranges. Lumbar support Use it during a normal working day and note lower-back comfort. Consider a return if the support cannot meet your lower back comfortably after adjustment. Breathability Check for heat build-up during ordinary work sessions. Consider another material or model if the seat consistently feels too warm for you. Recline and lock Try the recline settings according to the manual. Stop using the chair and contact support if the recline is unstable or a lock fails. Armrests Type, write and relax while checking forearm support. Consider a return if the armrests prevent a relaxed working position or access to your desk. Noise and castors Roll gently across a suitable floor surface and listen for persistent noise. Contact support about recurring creaks or floor marking before continuing use. Long-session comfort Work a normal week in the chair, with movement breaks. Reassess the fit if discomfort persists after you fine-tune the settings. How Do You Protect Your Return Eligibility? Test thoroughly, but handle the chair carefully while you decide. Keep the original box, foam and hardware for the whole trial. Keep the chair clean and unmarked, and use a suitable floor mat if needed. Note your delivery date and the relevant return deadlines. Contact support early if you are unsure, rather than on the final day. For its commercial guarantee, HBADA EU recommends retaining the original packaging and specifies condition requirements. Missing or inadequate packaging may lead to fees under that policy, subject to mandatory consumer law. These commercial terms do not override statutory withdrawal rights. What Are Your Rights If You Want to Return It? The 30-day commercial offer and your statutory right of withdrawal are separate. For most online purchases from a trader in the EU, you normally have 14 days from delivery to notify the seller that you wish to withdraw, followed by another 14 days to send the goods back. Exceptions apply. The statutory withdrawal period allows inspection of the product. Handling beyond what is necessary to establish its nature, characteristics and functioning may result in a deduction for diminished value. Keeping the original packaging is practical, but losing it does not automatically remove your statutory right. A commercial trial does not turn the statutory 14-day notification period into 30 days. If you want to use your statutory right, notify the seller within the applicable legal deadline. See the EU guidance on returns and withdrawal for details. Warranty coverage is also separate from a change-of-mind return. Refer to HBADA EU warranty and service information for product support after purchase. Which HBADA Chairs Can You Test at Home? If you are considering the HBADA X7 or E3 Pro 2026, check the current EU product page and the return terms for your order before purchasing. Use the same testing checklist for either chair, but pay attention to the features that make each model different. What to compare HBADA X7 HBADA E3 Pro 2026 Lumbar support Test how the AI lumbar-tracking system responds when you change position. Test how the three-zone adaptive lumbar support fits your lower back. Seat fit Check the selected model’s seat dimensions and adjustment range against your body and desk. Check the selected model’s seat dimensions and adjustment range against your body and desk. Recline and armrests Check support and control access while typing, leaning back and relaxing. Check the headrest, armrest and recline adjustments during your usual tasks. Additional features Try the comfort functions included with your selected version, following its manual. Focus on mechanical adjustments, mesh comfort and any optional footrest. Before ordering Confirm the exact configuration, delivery availability, return conditions and warranty. Confirm the exact configuration, delivery availability, return conditions and warranty. If you want automatic lumbar tracking, explore the HBADA X7 smart ergonomic chair and check the comfort features included with your selected version. If you want a mechanically adjustable chair to test for long workdays, compare the HBADA E3 Pro 2026. You can also browse the HBADA ergonomic office chair collection before your trial begins. Your 30-Day Test Plan Follow this simple plan so nothing is missed before the commercial trial ends. Keep the separate statutory withdrawal deadline in mind if you intend to use that right. Day 1 Assemble and Adjust Assemble by the manual, keep all packaging, and set the chair to your body. Days 2–7 Check Daily Fit Test daily fit, lumbar support, breathability, noise and castors. Days 8–21 Test Your Normal Work Routine Work your usual schedule and test recline, armrests and long-session comfort. Keep taking movement breaks. If you wish to exercise the statutory withdrawal right, do not wait beyond its notification deadline. Days 22–27 Fine-Tune and Decide Fine-tune settings and review your notes. If you are continuing under the commercial trial and the chair is not right, contact support now to confirm the return steps and deadline. Days 28–30 Complete Your Decision Keep the chair if it fits your needs, or complete the steps required under the commercial return policy within the applicable deadline. Do not assume contacting support on day 30 automatically extends the window. Limitations and When to Get Help A trial answers many questions, but not every one. A trial checks comfort and fit for you; it cannot promise a health outcome. Thirty days cannot establish the chair’s lifespan or long-term durability. Keep the chair and packaging in good condition while deciding. Commercial return terms and warranty coverage may vary by market and order. Mandatory consumer rights remain unaffected. If you have severe, persistent or radiating pain, consult a qualified healthcare professional. A chair is not a medical treatment. Conclusion The best way to judge an ergonomic office chair is to test it where you actually work. Assemble it, set it to your body, use it for real tasks, and keep the packaging until you are sure. Compare the X7 if you want automatic lumbar tracking, or the E3 Pro if you prefer mechanical adjustments. Make your decision before the relevant deadline, and keep the chair that fits you. Frequently Asked Questions How long is the HBADA EU home trial? HBADA EU currently offers a 30-day satisfaction guarantee from receipt. Check the applicable policy for the return procedure. It is separate from your statutory withdrawal right. Can you return an office chair after using it? Check whether you are returning under the commercial trial or exercising a statutory right. The conditions differ. Keep the chair clean, avoid damage and retain its packaging while deciding. How long does it take to get used to a new ergonomic chair? There is no fixed adjustment period for everyone. You may need several sessions to learn the controls and fine-tune the seat height, depth, lumbar support and armrests. Change one setting at a time. Do not keep sitting through pain in the hope that you will eventually adapt. Who pays for return shipping? Under HBADA EU’s commercial policy, change-of-mind returns involve a customer contribution to shipping, while damaged, defective or incorrect items are handled at HBADA’s shipping expense. Confirm the process before booking a courier; statutory rights remain unaffected. What should you check before the trial ends? Confirm the essentials: fit, long-session comfort, lumbar support, breathability, recline, armrests and noise. Also check that the chair suits your desk height and floor. Decide early enough to meet the deadline for the return route you are using. Sources and Useful Links HBADA EU Return and Refund Policy HBADA EU Warranty and Service HBADA User Manuals and Assembly Guides HBADA X7 Product Details HBADA E3 Pro 2026 Product Details Your Europe: Returns and the Right of Withdrawal How to Clean a Mesh Ergonomic Office Chair Without Damaging the Material How to Clean a Mesh Ergonomic Office Chair Without Damaging the Material Safe, simple care for mesh, spills, stains, casters and smart-chair components. Quick answer: Remove dust with a soft dry cloth or a vacuum on a low setting. Blot spills with a well-wrung cloth and mild soapy water, then let the mesh air-dry naturally. Avoid bleach, hot water, solvents and abrasive cleaners. Contents What can damage mesh? How to remove everyday dust How to clean spills and stains Frame, armrests and casters Cleaning methods at a glance How to clean a smart chair Safe deep-clean routine HBADA chair care FAQs What Can Damage a Mesh Chair? Mesh is designed to breathe and flex, but it can be damaged by unsuitable cleaning methods. Bleach, strong chemicals, solvents, hot water and abrasive cleaners can weaken or discolour the fibres. Stiff brushes and hard scrubbing can also snag or stretch the weave. Keep the chair out of prolonged direct sunlight, do not soak the mesh, and avoid spraying liquid directly onto it. Regular light cleaning is safer than occasional heavy cleaning. How Do You Clean Everyday Dust? Use a soft dry cloth Wipe the mesh with a dry microfiber cloth to remove surface dust, lint and light debris. Vacuum on a low setting If dust is caught in the weave, use gentle suction and move across the surface without pressing into it. A short weekly clean helps prevent dust and skin oils from building up, particularly when the chair is used every day. How Do You Clean Spills and Stains? For a fresh spill, dampen a soft cloth with mild soapy water and wring it out well. Blot the area from the outside of the mark toward the centre so it does not spread. Do not soak the mesh or scrub hard. For a stubborn mark, test an alcohol wipe on a hidden area first, then dab gently. Let the chair air-dry completely in a ventilated room before use. How Do You Care for the Frame, Armrests and Casters? Use a separate soft, damp cloth for the frame, armrests and base. Keep water away from the gas lift, recline mechanism and other moving parts. Never attempt to open the gas cylinder. Casters can collect hair and dust over time. Remove anything wrapped around the wheels, then wipe them clean so the chair can move smoothly. Cleaning Methods at a Glance What to Clean Safe Method What to Avoid Everyday dust Soft dry cloth or low-suction vacuum Hard brushing or scratching the mesh Fresh spills Blot with mild soapy water Soaking or rubbing the mesh Stubborn marks Spot-test, then dab gently Bleach, hot water or solvents Frame and armrests Soft damp cloth Abrasive or harsh cleaners Casters Remove hair and debris, then wipe Forcing debris deeper into the wheel How Do You Clean a Smart Chair With Electronics? Important: Switch the chair off and follow its supplied care instructions before cleaning around powered components. Use a dry cloth around controls, sensors, fans, batteries and powered adjustment areas. Never spray liquid directly onto the chair. Clean the mesh and non-electronic surfaces gently, then allow the chair to dry completely before use. Step by Step: A Safe Deep Clean Switch off a smart or powered chair before cleaning. Vacuum or dry-dust the mesh to remove loose debris. Mix a small amount of mild soap with lukewarm water. Dampen and thoroughly wring out a soft cloth. Blot the mesh without soaking it. Spot-test before treating stubborn marks. Wipe the frame, armrests and base separately. Remove hair and dust from the casters. Let the chair air-dry away from direct sunlight. Which HBADA Chairs Does This Apply To? This guide is suitable for HBADA mesh office chairs sold through HBADA EU, including the E3 Pro and X7 Prestige. For an E3 Pro, regular care means keeping the mesh clean and keeping moisture away from the gas lift and mechanism. For a smart or powered model, follow the model-specific guidance before cleaning around controls or powered areas. Frequently Asked Questions Can you wash a mesh office chair? You can clean it, but you should not soak it. Vacuum or dry-dust the mesh first, blot it with mild soapy water, and let it air-dry completely. What should you not use to clean a mesh chair? Avoid bleach, hot water, solvents, abrasive cleaners, stiff brushes and hard scrubbing. These can weaken, discolour or snag the mesh. How do you remove a stain from mesh? Blot the stain with a well-wrung cloth and mild soapy water. For a stubborn mark, spot-test an alcohol wipe first, then dab gently rather than scrub. How often should you clean a mesh office chair? Dust or vacuum the mesh once a week, deal with spills promptly, and carry out a deeper clean whenever needed. Does cleaning damage mesh over time? Not when it is done gently. Mesh damage usually comes from harsh chemicals, excess water, heat or heavy scrubbing. Sources HBADA EU E3 Pro Ergonomic Office Chair HBADA EU X7 Prestige Smart Ergonomic Chair HBADA EU FAQs ``` How to Set Up an Ergonomic Office Chair for Laptop Work How to Set Up an Ergonomic Office Chair for Laptop Work A more comfortable home office Start with the chair, then separate screen height from typing height. Adjust your seat to the desk, support your feet and lower back, and keep your shoulders relaxed. For longer laptop sessions, use a stand with a separate keyboard and mouse so you can position the screen without lifting your arms to type. In this guide The laptop setup challenge Five chair adjustments Screen and keyboard position Common problems and fixes Your setup checklist Choosing an HBADA chair Limitations and when to get help Final thoughts Frequently asked questions Sources Why Can Laptop Work Feel Uncomfortable? A laptop is easy to move between rooms, but its screen and keyboard remain joined together. A comfortable keyboard position can leave the screen too low. Raising the laptop may improve the view while making the keys harder to reach. An ergonomic office chair helps you build a supported sitting position. It does not solve this screen-and-keyboard trade-off on its own. For regular work at one desk, a separate keyboard and mouse allow more flexibility. Whether your workspace is a dedicated home office or a shared desk, check how the chair, work surface and laptop fit together. Comfortable working also depends on changing position, not holding one posture all day. How Should You Set Up the Chair First? Use the keyboard position and desk height as your starting points. Then adjust the chair to support you without making you reach or raise your shoulders. Step 01 Match the seat height to the work surface Adjust the seat until you can type with your shoulders relaxed, elbows close to your body and wrists roughly straight. If the desk height is adjustable, use both adjustments to find a comfortable position. Step 02 Support your feet Your feet should rest securely on the floor or a suitable footrest. If a fixed desk requires a higher seat position, a footrest can bridge the gap without forcing you to lower the chair below a comfortable typing height. Step 03 Check the seat depth Sit against the backrest and check the space behind your knees. Around two to three fingers is a useful starting point. If the model allows seat-depth adjustment, use it to avoid pressure from the front edge. Step 04 Align the lumbar support Position the support against your lower-back curve. It should not feel as though it is pushing you away from the backrest. Adjust the available settings gradually and recheck them during normal work. Step 05 Keep the armrests clear of the desk Set the armrests for light support with relaxed shoulders. Make sure they do not stop you moving close enough to the keyboard. Lower or reposition them if they catch on the desk edge. How Should You Position the Laptop Screen and Keyboard? With the chair adjusted, place the laptop on a stable stand and connect a separate keyboard and mouse. Start with the top of the screen at or just below eye level, roughly an arm's length away. Adjust text size and screen distance until you can read without moving your head forwards. Place the mouse beside the keyboard, rather than far to one side, and keep enough desk space for comfortable use. Working without extra equipment? Avoid raising the built-in keyboard to a height that makes you lift your shoulders. Keep the laptop in a manageable typing position and change tasks or take breaks regularly. A stand and separate input devices are worth considering when the same space becomes your everyday workstation. Common Laptop Setup Problems and Their Fixes Use these checks to review your workspace. They do not identify the medical cause of pain or discomfort. What you notice What to check Adjustment to try You look down for long periods Screen height and readability Use a stand with an external keyboard, and adjust text size. You lift your shoulders to type Keyboard and seat height Rebalance the chair and desk heights while keeping your feet supported. Your feet do not reach the floor Desk height and foot support Add a stable under-desk footrest if the working height requires it. You sit on the front edge of the seat Equipment reach and seat depth Move the keyboard closer and check whether you can use the backrest. Your armrests hit the desk Armrest height and width Lower or reposition them to allow closer access. You feel stiff after a long session Time spent sitting still Change position and include short walking or standing breaks. Your Laptop Workstation Checklist Adjust the seat for comfortable access to the keyboard. Keep both feet securely supported. Leave room behind your knees. Set the lumbar support against your lower back. Check that the armrests do not prevent desk access. Use a separate keyboard and mouse when raising the laptop. Adjust screen distance and text size for easy reading. Make time for movement and changes of task. Which HBADA Chair Suits Laptop Work? The right model is the one that fits both you and your desk. Before choosing from the HBADA EU office chair range, compare the adjustments available on the exact product and configuration. If you are considering an E3 or X7 model, check its regional product information rather than relying on specifications from another market. Seat dimensions, adjustment options and footrest availability should be confirmed for the version you intend to order. What to compare What to look for Seat-height range A suitable working height for your desk with stable support for your feet. Seat dimensions Enough room to sit comfortably while reaching the backrest. Lumbar support A support position and adjustment range that suit your lower back. Armrest adjustments Comfortable forearm support without blocking access to the work surface. Footrest type Distinguish a reclining leg rest from a footrest used during upright typing. Regional configuration Confirm the selected model, dimensions, capacity and availability on HBADA EU. No chair feature removes the need to position the laptop correctly. Reserve space in your setup for a stable stand, keyboard and mouse as well as the chair. Limitations and When to Get Help Chair adjustments support your working position; they do not treat medical conditions. Screen placement and equipment reach still need separate attention. A reclining position is not automatically suitable for keyboard work at a fixed desk. Speak to a qualified healthcare professional if discomfort persists or becomes severe. For an employer-provided workstation, ask about the assessment and guidance applicable in your country. Final Thoughts A practical laptop workstation starts with a chair that fits the desk and supports your feet and back. Keep the keyboard close, position the screen independently where possible, and check that your armrests do not get in the way. Small adjustments are useful, but regular movement remains part of the setup. Frequently Asked Questions How should you sit when working on a laptop? Sit back with your lower back supported and your feet stable. Keep your shoulders relaxed and the keyboard close enough to reach without leaning forwards. A separate keyboard and mouse allow you to raise the screen while keeping a comfortable typing height. Do you need a footrest for laptop work? Only if your feet lack stable support at the seat height needed for your desk. Check the chair and desk adjustments first. If the desk is fixed and your feet still dangle, an under-desk footrest can help support them. Is an ergonomic chair enough for working on a laptop all day? No. The chair supports your sitting position, but screen height, keyboard reach and movement breaks also matter. For regular desk work, consider a laptop stand with a separate keyboard and mouse. Can you use the same setup at a dining table? Check the table height, legroom and how close the chair can move to the edge. If the surface is too high, raising the chair may require a footrest. A table that prevents comfortable keyboard access may not suit extended work, even with an adjustable chair. How often should you move during laptop work? Include short, regular opportunities to move rather than staying in one position until you feel uncomfortable. Stand, walk or switch tasks when practical. Follow any workstation guidance provided by your employer and applicable in your country. Sources and Product Information HSE: Working with display screen equipment — a UK practical reference, not a statement of legal requirements across the EU. HBADA EU: Current office chair range and product information Availability and specifications vary by model and configuration. Use the relevant HBADA EU product page to check the version available for your delivery location.